Lightning Laxus (talk | contribs) No edit summary |
Lightning Laxus (talk | contribs) No edit summary |
||
| Line 33: | Line 33: | ||
| duration = |
| duration = |
||
| ability_video = |
| ability_video = |
||
| − | | ability_details = *Applies to Sentry and Tank |
+ | | ability_details = *Applies to configurations Sentry and Tank upon the complete transformation. |
| + | *Damage reduction is applied before [[armor]]. |
||
| − | *This passive only works after Bastion has finished transformation. |
||
}} |
}} |
||
| Line 56: | Line 56: | ||
| headshot = ✓<!-- ✓/✕ --> |
| headshot = ✓<!-- ✓/✕ --> |
||
| ability_video = FvKaYo9rQp8 |
| ability_video = FvKaYo9rQp8 |
||
| − | | ability_details = |
+ | | ability_details = |
| ⚫ | |||
|spread=Max: 1.25 degrees |
|spread=Max: 1.25 degrees |
||
}} |
}} |
||
| Line 85: | Line 84: | ||
| ability_details = |
| ability_details = |
||
*Makes Bastion immune to knock-back effects. |
*Makes Bastion immune to knock-back effects. |
||
| − | * |
+ | *Bastion has a glowing blue cube on its back that can be hit for [[headshot]] damage. |
| − | *This ability used to be named '''Configuration: Siege'''. |
||
*Bastion's spread decreases continuously while firing, up to 33% after 2 seconds. |
*Bastion's spread decreases continuously while firing, up to 33% after 2 seconds. |
||
*Bastion comes out of Configuration: Sentry if it is [[hack]]ed, [[Sleep Dart|slept]], [[Charge|pinned]], or [[Crowd Control#Knock Down|knocked down]]. |
*Bastion comes out of Configuration: Sentry if it is [[hack]]ed, [[Sleep Dart|slept]], [[Charge|pinned]], or [[Crowd Control#Knock Down|knocked down]]. |
||
| Line 122: | Line 120: | ||
| official_description = Bastion restores its health; it cannot fire weapons while the repair process is in effect. |
| official_description = Bastion restores its health; it cannot fire weapons while the repair process is in effect. |
||
| wiki_description = |
| wiki_description = |
||
| − | | ability_type = |
+ | | ability_type = Ability |
| health = |
| health = |
||
| shot_type = |
| shot_type = |
||
| Line 161: | Line 159: | ||
| pellets = |
| pellets = |
||
| fire_rate = 1 shot per second |
| fire_rate = 1 shot per second |
||
| − | | ammo = |
+ | | ammo = ∞ |
| ammo_drain = |
| ammo_drain = |
||
| reload_time = |
| reload_time = |
||
| Line 426: | Line 424: | ||
==Trivia== |
==Trivia== |
||
[[File:LEGO Bastion2.png|thumb|Bastion in LEGO form]] |
[[File:LEGO Bastion2.png|thumb|Bastion in LEGO form]] |
||
| ⚫ | |||
| − | * |
+ | *Configuration: Sentry used to be called Configuration: Siege. Also it had a 1000 [[HP]] front-facing [[barrier]] and Bastion had a rotation limit of 60 degrees in frontal cone. |
*A Bastion portrait is available in ''[http://starcraft.wikia.com/wiki/StarCraft_II StarCraft II]'' for those who purchased the ''[[Origins Edition]]''.<ref>2015-11-06, [http://overwatch.blizzplanet.com/blog/comments/overwatch-origins-edition-pre-orders-have-begun Overwatch: Origins Edition (PC) Pre-Orders have Begun]. ''Blizzplanet'', accessed on 2015-11-07</ref> |
*A Bastion portrait is available in ''[http://starcraft.wikia.com/wiki/StarCraft_II StarCraft II]'' for those who purchased the ''[[Origins Edition]]''.<ref>2015-11-06, [http://overwatch.blizzplanet.com/blog/comments/overwatch-origins-edition-pre-orders-have-begun Overwatch: Origins Edition (PC) Pre-Orders have Begun]. ''Blizzplanet'', accessed on 2015-11-07</ref> |
||
Revision as of 06:08, 9 November 2019
| Bastion | |
|---|---|
Real Name |
SST Laboratories Siege Automaton E54 |
Age |
30 |
Occupation |
Battle automaton (formerly) None |
Base |
Black Forest, Germany (formerly) |
Affiliation |
Torbjörn Lindholm |
| Chris Metzen[1] ' | |
Cosmetics |
Cosmetic page |
Quotes |
Quotation page |
Role |
Damage |
Health |
200 |
Armor |
100 |
Character Video
| |
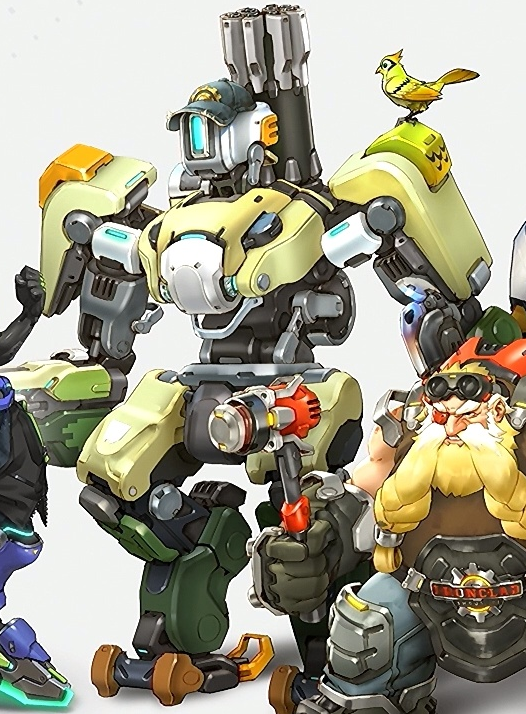
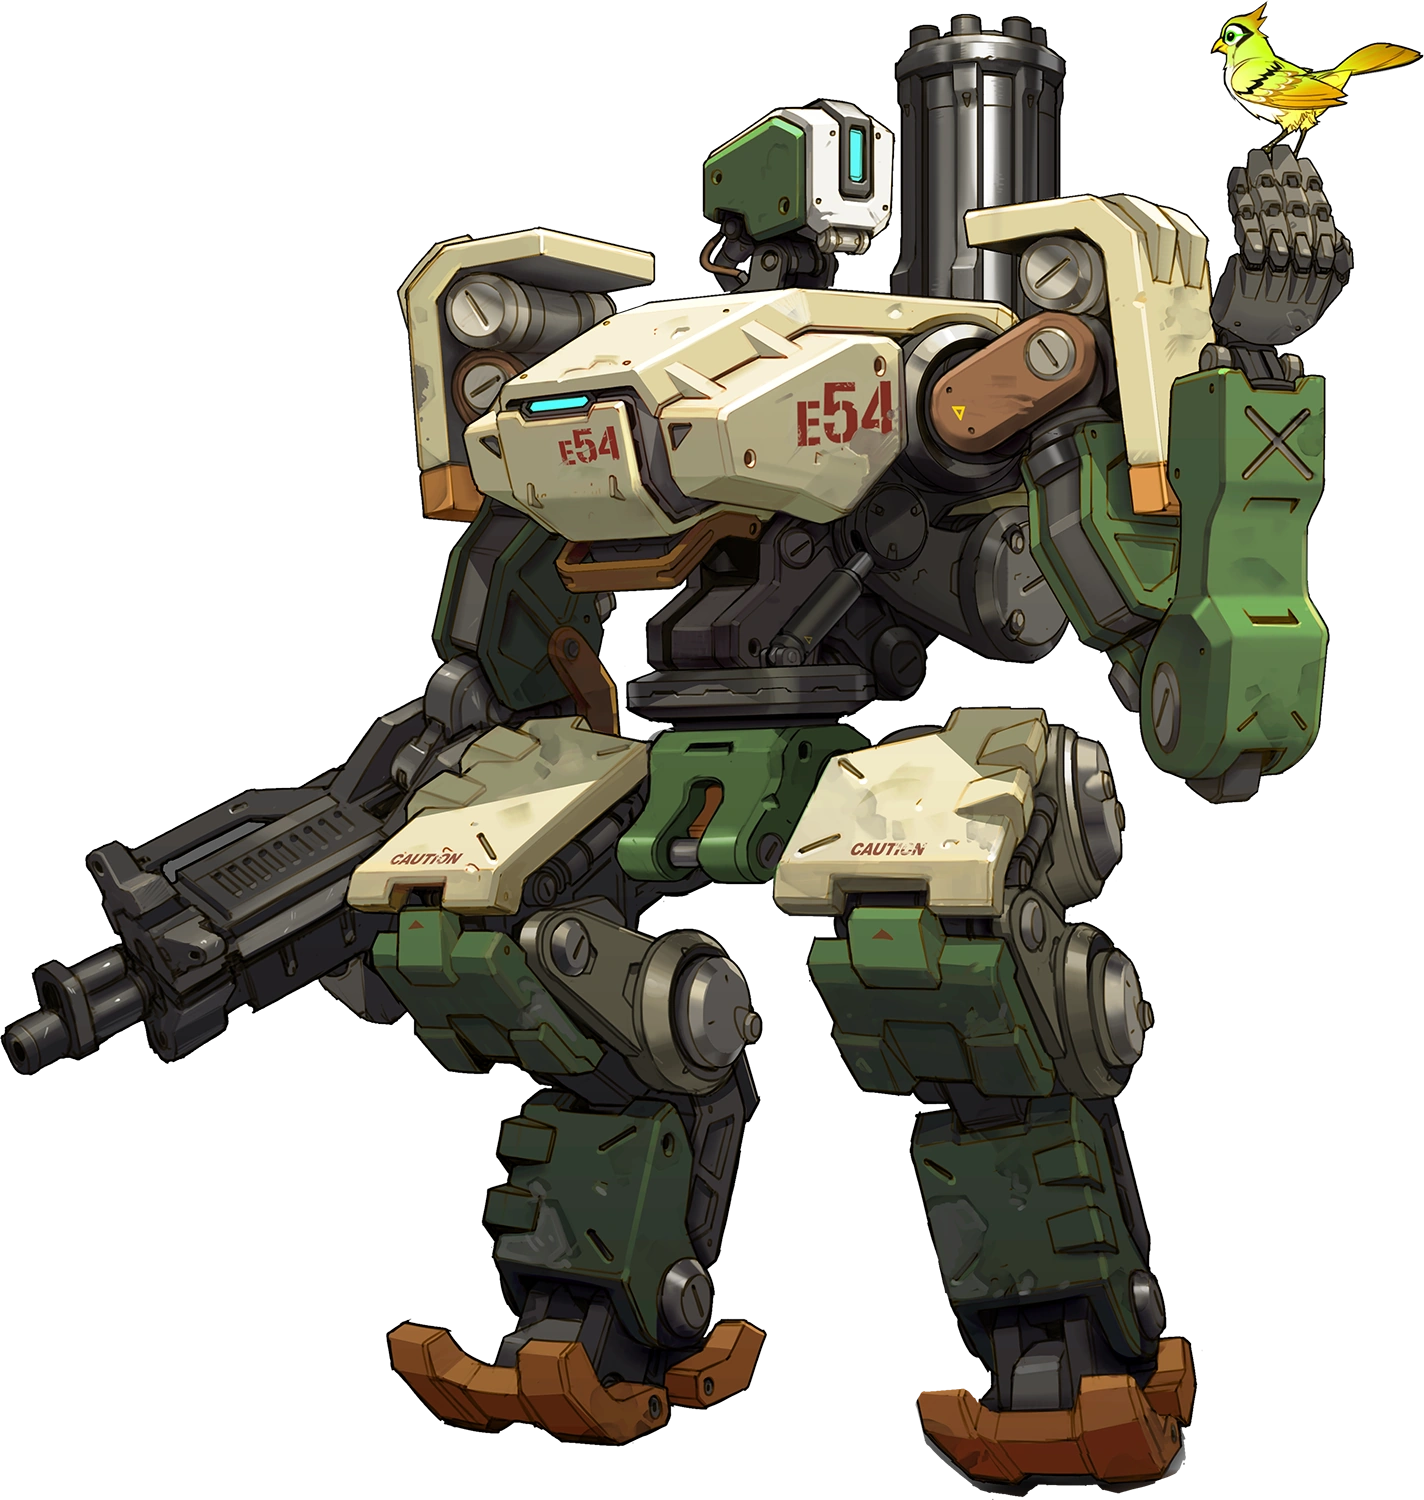
Bastion is a Damage hero in Overwatch.
Overview
Repair protocols and the ability to transform between stationary Sentry, mobile Recon and devastating Tank configurations provide Bastion with a high damage output at the cost of mobility.
Abilities

- Makes Bastion immune to knock-back effects.
- Bastion has a glowing blue cube on its back that can be hit for headshot damage.
- Bastion's spread decreases continuously while firing, up to 33% after 2 seconds.
- Bastion comes out of Configuration: Sentry if it is hacked, slept, pinned, or knocked down.

0.5 seconds (into Recon)
- Bastion can use reconfigure while in the air.
- After 1.5 seconds, the unused Configuration will automatically be reloaded.

7 seconds recharging
- Bastion cannot activate Self-Repair when the resource meter is below 20%.
- There is a 0.25 second recovery time between repairs.
- Does not consume resources if Bastion is at full health.

- Bastion passively generates 1% Ult Charge every 4.62 seconds.
Strategy
Bastion is a hero with two main forms. Its default form is a mobile bipedal form with a sub-machine gun, while the second being a completely immobile turret form. Both of these perform in unique ways, and must be utilized to their fullest. The most notable part of Bastion's kit is Reconfigure, which turns it into a stationary turret gun. This turret has some of the highest damage output in the game, being able to shred through shields and heroes alike, but it can't deal a critical shot. In tank form, while losing some damage output, it gets more crowd control ability, as the explosion of the shells fired are very large and dangerous to all enemies. However, Configuration: Sentry poses two major weaknesses to Bastion. The first is immobility, which causes Bastion to become an easy target to focus fire on. The second is a weak point that appears on its back in turret configuration. Faster heroes can easily get behind Bastion and kill it quickly with this weak point. Even though it has reasonable health and is able to repair itself in any situation, the healing ability has limits and its large frame makes it an easy target. Bastion is also relatively slow, making it easy to be outflanked by enemies.
Weapons & Abilities
- Ironclad: Bastion's passive ability. It takes 20% reduction damage while in Sentry and Tank configuration.
- Ironclad will take the lead in reducing all incoming damage before the armor reduces the remained outcome.
- Bastion has to finish the transformation to get this passive ability. As it will still receive normal damage while transforming, try not to use it as an instant defensive against heavy damage.
- Configuration: Recon: Bastion's primary form. The primary form of Bastion features a submachine-gun attached to its right arm as its weapon. The weapon fires hitscan bullets with high accuracy.
- While the main role of this form is to find a spot to transform into Sentry, the weapon itself deals a good amount of damage; per shot, the damage is the same as Soldier: 76's Pulse Rifle, but with slightly lower range and fire rate, but smaller spread. It can kite a sniper or airborne target while keeping itself moving rather than being a stationary turret, easy to be shot down.
- In the case of engaging a mobile enemy, fighting with this mode is recommended over transforming into Sentry, as it can deal a critical shot while the other cannot. Defensively, it also has a higher chance to disengage if the fight isn't in its favor rather than being stuck in an immobile form, and it does not have a weak spot on its back while in Recon, which is easy for mobile enemies to target otherwise.
- Configuration: Sentry: Bastion's secondary form. After finishing the transformation, It will become a stationary turret equipped with a gatling gun capable of unleashing a hail of bullets. Bastion's weak point will be changed from its head to its back, which is opposite to the targeted point of view. The downside of this form is it becomes an immobile target and unable to deal a critical shot.
- Sentry form works best on a fixed area where the enemy is likely to be in; such as choke point, enclosed spaces or a doorway.
- Bastion will not receive any knockback from enemy attacks, like Roadhog's Whole Hog or Lúcio's Soundwave.
- Although Bastion has Ironclad and Self-Repair to help it withstand attacks, without a Barrier from an ally such as Reinhardt or Orisa, it can easily become a sitting duck as it draws enemy fire due to being a high-damage stationary target.
- Be careful for flankers. Some heroes like Tracer or Genji can get behind Bastion and easily dispatch it.
- While Sentry form has large spreading and damage falloff at very long range, it can still be useful to force the enemy to move in other ways. Keep in mind that the large spreading means it is less effective against far-away snipers.
- Take advantage of being on high ground for this form. It can minimize enemy fire received and become a harder target to counterattack even though it can't move.
- Some abilities can force Bastion to change itself back to Recon form, such as Reinhardt's Charge or Earth Shatter, Sombra's Hack or EMP, Ana's Sleep Dart and Roadhog's Hook.
- Reconfigure: Bastion's transformation skill. It changes to Configuration: Sentry within 1 second, while it changes back to Configuration: Recon within only 0.5 seconds.
- This ability can be used mid-air, so Bastion can activate this ability mid-jump from a higher ground to lower ground, ready to fire at an opponent.
- Bastion will reload each form's weapon after roughly a second of being in the other form, generally negating the need to reload between forms.
- Self-Repair: Bastion's method of self-healing. It will repair itself for up to 4 seconds; this can be stopped by the player at any time. It can heal 25% of its health per second, making this a powerful self-healing. Bastion can freely move and heal at the same time, and can't be interrupted by enemy attack.
- Combining Self-Repair with the passive ability of Ironclad while in Configuration: Sentry makes it harder to take down because of the combined healing and damage reduction.
- While being a powerful self-healing, it stills has a limit. Wasting it on non-lethal damage will leave it vulnerable to the next following damage.
- Pairing with a healer will grant higher survivability. It can leave the main healing to the support, but in case of being heavily focused on, it can begin the Self-Repair to withstand damage while the support keeps healing it.
- Don't get too cocky engaging a group of enemies while having only minimum charge of its gauge. Bastion can't activate the Self-Repair when the gauge is below than 20%, which leaves it even more vulnerable.
- Configuration: Tank (Ultimate): Bastion's Ultimate form. After it has finished the transformation for 1.5 seconds, it changes itself to a tank model and replaces its previous weapon with an explosive cannon, which deals heavy damage and creates a strong knockback around the blast.
- Bastion has no weak point and benefits from Ironclad in this form, making it strong against direct fire from enemies.
- While losing some damage output in comparison to Sentry form, Bastion gains crowd-control ability in return from the explosive cannon.
- It isn't recommended to use this form when the enemy still has a barrier. Alone, Reinhardt's Barrier Field is capable of withstanding most of its shells. It is encouraged to use the ultimate after its teammates destroy the barrier or separate him from covering his teammates.
- The cannon shell can be used to propel Bastion upward when fired at the ground while jumping, creating a rocket jump method. With surprising vertical movement, it can propel itself high enough to shoot down any enemy who is behind a barrier or is on higher ground for a brief moment.
General strategies
- Bastion is played best when you mix both configurations together. It should be noted that Recon Configuration's submachine gun is a highly accurate weapon with reasonably high damage. Do not be afraid to change back into Recon in order to run to a better spot, but try to do so behind cover.
- You should also know how to correctly utilize Bastion's Self Repair. It is a powerful self heal, healing at the rate of 25% per second, lasting until cancelled or out of charged. While you can repair yourself in any situation, the healing has a charge limit. Staying in front of focused fire from enemies would be unwise as the healing rate is not fast enough to compensate for the high rate of receiving damage.
- Bastion works incredibly well with heroes who provide it with survival capability, such as Reinhardt, Torbjörn and Symmetra.
- A common tactic for Bastion on Payload modes is to pair with Reinhardt and Mercy; the barrier combined with Mercy's damage amplifier will boost both Bastion's damage output and defensive capability while setting up on a payload.
- Carefully consider where to place yourself in turret mode. Change positions often (when you can safely move), especially whenever you feel that the enemy knows your location or is forming a strategy against you. Try to use the element of surprise to your advantage. Bastion does especially well in narrow corridors and unexpected positions.
- Bastion excels at destroying slow-moving and/or high-health targets, such as Winston, Roadhog, unshielded Reinhardt, and a flying Pharah; however, in some situations you should prioritize killing high damage dealing enemies, such as Reaper or another Bastion.
- When in turret mode, Bastion's weak point is behind it, and can be seen from almost any angle except from directly in front of it. Be vigilant for flankers, but try not to expose your weak point to the frontline while dealing with them.
- Bastion can go down relatively quickly when faced with focused fire from the entire enemy team, especially if they have high damage output. Prioritize taking out high damage output enemies as quickly as possible, or retreat.
Match-Ups and Team Synergy
Tank
| Hero | Match-Up | Team Synergy |
|---|---|---|
D.Va |
D.Va can use her Defense Matrix to completely block your attacks for a brief period, allowing her teammates to finish you off easily. If this happens, try to shoot in a direction that Defense Matrix isn't covering. It's rarely smart to try to retreat while Defense Matrix is active, as this will just make it easier for her teammates to kill you; Defense Matrix is brief, and once D.Va has used it up, it will be easy to shred through her and destroy her Mech. Be careful about D.Va's Self-Destruct; your low mobility will make it difficult to escape in time. | (To be added) |
Orisa |
(To be added) | (To be added) |
Reinhardt |
Reinhardt has little means to harm you at distance; a Reinhardt standing out in the open is asking for his barrier to be shredded, leaving him and his allies vulnerable. If you see a Reinhardt roaming about, make shredding his shield your top priority; even if you don't kill him, losing his shield will cost his team their protection as well as their time. If Reinhardt is able to approach you before you can shoot down his shield, a Charge can incapacitate you before you're able to kill him, and your immobility while in Sentry Configuration makes landing that Charge all the easier. | Reinhardt's massive shield is incredibly handy while you're set up in Sentry Configuration; he will be able to protect you from enemy fire, while your massive damage output will be able to fend off opponents who wish to advance on your position. |
Roadhog |
If Roadhog’s grabs you with his Chain Hook, he can pull you out of position and force you into Recon Configuration, leaving you an easy target to quickly finish off. If Roadhog's hook isn't ready, though, his large hitbox and low speed makes him incredibly easy to rip apart with your gatling gun. Roadhog is unlikely to peek his head around you unless his Hook is ready, though, so try to stay behind a friendly barrier to block that hook so you can fire away in peace. Even at a distance, you'll be able to deal substantial damage to Roadhog if he's forced out in the open. You won't be knocked back by Whole Hog, but at close range its massive damage output will quickly kill you; your best option in this scenario is to fire back and hope you can kill him before he can kill you, because if you attempt to run away, you're much more certain to be killed. | (To be added) |
Sigma |
(To be added) | (To be added) |
Wrecking Ball |
(To be added) | (To be added) |
Winston |
Winston low, steady damage output, lack of critical hit capability, large hitbox, and necessity to attack at close ranges makes him an incredibly easy foe for you to kill. The best he can do is Jump Pack away out of your field of view; if he tries to approach you, even with his Barrier Projector up, you can quickly destroy it and then destroy him in turn. Even when he activates Primal Rage, his knockback won't work on you if you're in Sentry Configuration, and if he's brave enough to stay in your field of view, you can rip him apart within a few seconds of continuous fire. | (To be added) |
Zarya |
Your only real concern when fighting Zarya is to make sure you don't attack her or her allies while her Barrier is active. While her powered laser won't out-damage your gatling gun, if she's supported by teammates she can be kept alive long enough to kill you before you can kill her. If she approaches you with her Barrier up, it is actually sometimes more advantageous to attack; ripping through her Barrier will power her up, but it will also cause it to dissipate quicker, meaning if you're accurate you should still be able to kill her before she kills you. | (To be added) |
Damage
| Hero | Match-Up | Team Synergy |
|---|---|---|
Ashe |
(To be added) | (To be added) |
Bastion |
Running into another Bastion in the wild while you are both in Recon Configuration is extremely rare. Should this happen and you catch him alone, try to quickly transform into Sentry Configuration to gun him down. If his teammates are nearby, better to remain in Recon Configuration and try to land some headshots to take him out before he can transform. If you are in Sentry Configuration and a Recon Bastion rounds a corner, try to gun him down before he can run or transform, as in that state he is of no concern to you. Likewise, if you are in Recon Configuration and you round a corner and spot a Sentry Bastion, quickly try to duck and avoid his fire or, if a friendly barrier is nearby, transform and try to gun him down. Both of you running into each other in Sentry Configuration is only going to happen on Escort maps if one of you is riding the Payload, in which case it comes down to who sees who and who opens fire on who first. | (To be added) |
Doomfist |
(To be added) | (To be added) |
Genji |
Genji will often try to heckle you with his Shurikan, either from a safe distance or up close where he'll hope he can bait you into firing at him while Deflect is active. If Genji approaches you while in Sentry Configuration, be ready to stop firing as soon as he activates Deflect. While this will keep you safe momentarily, it will also free his team to push while you can't attack, so either get your teammates to deal with Genji and his allies or, if necessary, be ready to transform and move out. Aside from Deflect, Genji will have difficulty killing you, instead proving to be more of a nuisance. If Genji activates Dragonblade, try to remain in Sentry Configuration to withstand more strikes from him and shoot back (though again, be ready to stop should he activate Deflect). Fighting a Genji with Dragonblade will come down to the wire, as one of you is going to die incredibly quickly based on reaction time. Even when using your Configuration: Tank Ultimate, be on the lookout for Genji, as a reflected shell can take a huge chunk out of your health. | (To be added) |
Hanzo |
Hanzo can repeatedly peek around a corner and try to hit you with arrows without exposing himself, so either stay behind cover or get away if he's heckling you. While you can use Self Repair to patch up between shots, a burst of Storm Arrows could finish you off when at lower health. You're not as easy of a target while in Recon Configuration, but your damage output is also severely hampered. If Hanzo hits your location with a Scatter Arrow, it would be wise to transform and move, since enemies knowing exactly where you're situated will make you an even easier target than you already are. Should you weaken a Hanzo enough for him to flee, don't chase him down, as his mobility far exceeds yours; let your teammates handle him, or simply hold your position and wait for him to return. | (To be added) |
Junkrat |
Junkrat is unlikely to hit you at great distances, and in close combat you can usually gun him down before he can hit you. However, because you are stationary, this can allow him to make tricky shots, sneak up behind you or throw a Concussion Mine behind a barrier you're hiding in. Because you won't be moving around a lot, though, you're also less likely to step in Junkrat's Steel Trap. If a Junkrat is trying to spam grenades at you, your best bet is to obviously kill him, but if he's peeking behind corners, consider relocating to avoid his high-damage bombs. If you hear him activate RIP-Tire, it's better to stand your ground than attempt to flee; a quick hailstorm of bullets can destroy RIP-Tire before it has the chance to detonate, whereas if you run it can easily catch up to you and kill you. | (To be added) |
McCree |
McCree is typically at a disadvantage when you are in Sentry Configuration. Ironclad will reduce a good amount of damage from his Peacekeeper, though a sneaky McCree can peek around a corner and shoot at you while you have little opportunity to return fire. Always try to be set up so McCree won't be able to get behind you and shoot your critical hitbox in your rear, with your back to a wall or covered by a barrier. | (To be added) |
Mei |
If you aren't being protected by cover or a berrier, Mei’s icicle can heckle you with her Icicle from a distance, which can prove to be rather annoying. Her Ice Wall can completely cut off your line of sight on the enemy; while you can eventually run through it with your gatling gun, the time it will take to do so may be enough for her team to sneak around and make an offensive push on your position. In close quarters combat, though, Mei fares far worse. Even if she freezes you, she lacks the killing potential to quickly finish you off; as soon as you thaw out, you can run through her with your gatling gun. Even if she uses Cryo-Freeze to heal herself, you can take that time to use Self-Repair. Should you get caught in a Blizzard, you have a very minute chance of transforming and escaping, but only if you're at the very edge of its area of effect; if you're trapped in the middle, better to remain in Sentry Configuration with your Ironclad defensive buff rather than transform and render yourself an easier target. | (To be added) |
Pharah |
While Pharah can repeatedly peek behind corners to shoot a rocket and hide, your Ironclad and Self-Repair can help you withstand most of her attacks. Still, it will only take a few rockets to kill you, so having a barrier protect you can help ensure your safety. Her Concussive Blast’s large knockback won't affect you while you are in Sentry Configuration. While your gatling gun is incapable of headshots, it can still rip through Pharah if she tries to fly out in the open in your view. Even when in Recon Configuration, your hitscan gun can land accurate shots on her; just keep in mind that your low mobility will make it easy for her to land her shots on you. In Configuration: Tank, it may be difficult to land airshots against Pharah, but when you do, not only are they incredibly satisfying, they will often take her out in a single shot. Watch where she is hovering, and try to predict where she'll be so you can blow her out of the sky. | (To be added) |
Reaper |
Reaper’s flanking abilities can help him easily approach you from out of your view. If he sneaks up behind you, he may be able to gun you down before you can react. If you know a Reaper is about, be attentive and be prepared to turn around and run him down; while his point-blank damage is exceptional, yours is even moreso and will make quick work of him even with his self-healing. At longer distances, Reaper will be ineffective against you; his guns have pitiful dropoff, and while your gatling gun also suffers from dropoff, you can still kill him in a second or two with some accurate firing. | (To be added) |
Soldier: 76 |
Your biggest concerns against Soldier: 76 are his burst damage with his Helix Rockets and his impressive range. If you aren't behind the protection of a barrier, Soldier: 76 can be capable of catching you by surprise and shooting you down before you can retaliate and kill him. If he's peeking back and forth behind a wall, you should heal between attacks. If he's coming at you with full force, though, don't attempt to heal, as your healing won't outdo his damage; attack back and hope you can shred through him before he shreds through you. If he runs away with Sprint, don't chase after him; you'll be much more vulnerable while in your Recon Configuration, and he'll have most likely either healed up or regrouped with his team. | (To be added) |
Sombra |
Sombra can prove to be a huge headache to you should she sneak behind you and Hack you. A Hack will force you out of Sentry Configuration, which will make you a much easier target while allowing her teammates to safely pass through a choke you were guarding. Your stationary nature, as well as your tendency to hide behind barriers, makes you a prime target for her EMP Ultimate. You might be able to handle yourself against Sombra okay in a one on one fight if you are hacked, but in a group fight you're going to be much less helpful for your team; focus on retreating, staying alive, and going back into Sentry Configuration as soon as the hack wears off. Should you see visual indicators of Sombra using Translocator, or should you suspect she's running around in Stealth, some quick spraying with your gatling gun can potentially force her out of her Stealth, rendering her an easy target. Don't worry about being Hacked while in Configuration: Tank, as it will have no effect. | (To be added) |
Symmetra |
While you can chew through Symmetra's health pretty quickly, a high-powered Symmetra can likewise chew through you quite quickly as well. Symmetra will often try to place a teleporter behind your setup so her team can ambush you; while it may be tempting to try to gun down her allies as they walk through the teleporter, it would be a better idea to simply destroy the teleporter as soon as she activates it; that way, only one or two teammates will be trying to attack you in your defensive setup, which will be much easier for you and your allies to handle. When roaming in Recon Configuration, be wary of Sentry Turrets; should one start attacking you, a quick burst with your submachine gun can destroy it. Just be ready for
the Symmetra to show up and finish you off while at low health; if she attempts to fight you one on one while you're weakened, don't flee and heal, because while you're doing so her weapon is only going to get stronger. As soon as you're safe from the Sentry Turret, shift into Sentry Configuration and rip through her before she has the chance to power up. Photon Barrier will completely block off your gunfire; it may be tempting to try to rip through it with your gatling gun, but instead try to focus on enemies on your side of the barrier, and be ready to flee with your team if need be. |
A friendly Symmetra's Teleporter can be a huge help due to your low mobility. You can even transform atop the Teleporter before teleporting; this way you'll already be in Sentry Configuration once you're on the other end, ready to gun down any nearby opponents. Photon Barrier will keep you safe from enemy fire during its duration, so try to stay on one side of it and gun down opponents beyond it. |
Torbjörn |
As you and Torbjörn both tend to remain in the backline, a match-up between the two of you is rare. If Torbjörn walks into your field of view while you're in Sentry Configuration, he's a prime target to tear to shreds. If he deploys a Turret in your view without a barrier's protection, you can likewise rip through it in less than a second. Even if a barrier is protecting it, if no other enemies are nearby to attack you, you can destroy the barrier and turret extremely quickly, and its lower damage will barely leave a scratch on you. Should you run into a Turret while moving in Recon mode, consider gunning it down with your standard fire or quickly transforming to destroy it; if Torbjörn or his allies aren't nearby, the Turret is no threat to you. Should you run into Torbjörn while in Recon Configuration, either try to retreat to your team while backpedaling and firing or quickly transform into Sentry Configuration and attack him. Molten Core can prove very dangerous due to your stationary nature; should Torbjörn use it on you, quickly get up and flee, otherwise you're going to die extremely quickly. | (To be added) |
Tracer |
Tracer’s small hitbox and mobility makes herself difficult to hit. She can easily flank you and escape, and her Ultimate can potentially kill you even while in Sentry Configuration. This requires her to get close to you; a wily Tracer can use Blink to avoid your line of sight, but if you have twitchy aim and can keep a lock on her, you can run through her minuscule health in an instant, especially at close range. | (To be added) |
Widowmaker |
Widowmaker's ability to peek around corners and kill you from a distance without exposing herself makes her a dire threat. Try to position yourself behind cover or in areas where Widowmaker lacks long line of sight. If a Widowmaker has a beat on you, your low mobility makes it extremely difficult to escape her sight, making your best option to not be in her sight in the first place. | (To be added) |
Support
| Hero | Match-Up | Team Synergy
|
|---|---|---|
Ana |
Your low mobility makes you an easy target for Ana's Sleep Dart and Biotic Grenade, both of which will significantly cripple you. A Sleep Dart will force you back into Recon Configuration, rendering you an easy target, while Biotic Grenade will strip you of your Self-Repair healing. Try to hide behind a barrier or behind cover to make it more difficult for Ana to hit you. | While Nano-Boosted, your shells from Configuration: Tank will be even more powerful, and you'll be more capable of withstanding enemy attacks during your Ultimate. Try to have your Ana use Nano-Boost on you during your transformation rather than before, as the time it takes to transform will waste time that you would normally have available for Nano-Boost. |
Baptiste |
(To be added) | Baptiste's Immortality Field makes him one of your best friends. While safely under its protection, you can ensure you won't be hit by any kind of sudden burst damage, opening you up to focus much more on offense and not having to worry about protecting yourself from flanking threats. Just keep in mind that the device that powers Immortality Field can be vulnerable, so try to have a friendly Tank keep both you and the device protected with a barrier. As you tend to stay in one place, Amplification Matrix can benefit you in making even easier work of any enemies pushing into your field of view; if your Baptiste activates it during a big enemy push, you can quickly mow them down before they can push through a choke point. |
Brigitte |
(To be added) | (To be added) |
Lúcio |
Because Lúcio’s healing occurs over a long period of time, your burst damage can kill his teammates before he can heal them back to full health. Lúcio’s low damage can be shrugged off even if he's peeking around corners and heckling you with distant shots. Soundwave won't effect you in Sentry Configuration, so you don't have to worry about Lúcio sending you flying off cliffs. While Sound Barrier's massive health boost will make it much more difficult for you to gun opponents down, especially during Configuration: Tank, slower and less well protected enemies are still vulnerable targets even with the health boost. Your only real concern is Lúcio's high mobility, which can make him a tricky target to kill; focus on his teammates in a team-fight, unless he tries to get up close and personal, in which case some point-blank fire should be able to quickly kill him before he can evade or flee. | (To be added) |
Mercy |
Mercy's pistol damage can generally be shrugged off, and if she's brave enough to try to fight you out in the open, you'll be able to make quick work of her. She won't be able to outheal your damage towards her teammates, but enemies who peek in and out of cover will be quickly healed and encouraged to continuously heckle you. Be wary of a battle of attrition, and get your teammates to help you fend off Mercy's allies if you can. | (To be added) |
Moira |
(To be added) | (To be added) |
Zenyatta |
Zenyatta's Orb of Discord and long-range orbs make him a deadly threat if you're not careful. Orb Volley in particular can cause massive burst damage if he's peeking in and out around corners. Your immobility makes you a prime target for Zenyatta, so make sure you're protected or out of his field of view. Should Zenyatta be forced into the open, his low mobility makes him very easy to kill. Transcendence can protect himself and his teammates from your immense power; while you sometimes might be able to kill enemies at point blank if they approach you, it may be best to pack up and flee behind your team so you aren't ambushed during the enemy team's push. | A friendly Zenyatta's Transcendence can protect you from a big enemy push, but this will do little against burst damage such as the likes of Self-Destruct or RIP-Tire. Try to focus on enemies hit with Orb of Discord so you can kill enemies one by one rather than leaving the entire team at low health but allowing them to heal. |
Story
Once a frontline combatant in the devastating Omnic Crisis, Bastion has all but lost its combat programming and now explores its surroundings, fascinated by the world and its inhabitants.
Though Bastion's new nature is gentle, its core combat programming takes over when the unit senses danger, utilizing its entire arsenal to eliminate anything it perceives as a threat. This has led to instances of conflict with the few humans it has encountered, and it tries to avoid populated areas in favor of the wild, uncharted regions of the world.[2]
Background
Originally created for peacekeeping purposes, Bastion robot units possessed the unique ability to rapidly reconfigure themselves into an assault-cannon mode. But during the Omnic Crisis, they were turned against their human makers, forming the bulk of the omnics' rebel army. Following the resolution of the crisis, nearly all of the remaining Bastion units were destroyed or disassembled. To this day, Bastion units still symbolize the horrors of the conflict.[2]
The Last Bastion
Bastion was programmed with the mission to attack Stuttgart alongside many other Bastion units, but it was severely damaged during the fight. It lay dormant in the Black Forest near Eichenwalde, forgotten for over a decade.[2][3]

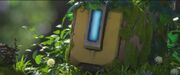
Bastion re-activates
One day, Ganymede started to build a nest on Bastion's right shoulder, and discovered its visual sensory screen. Ganymede roused the unit by pecking on the screen. Bastion awoke remembering its directive -- Stuttgart. It began to make its way to the city, while admiring the beauty of the forest around it and forming a bond with Ganymede, offering an appropriately-sized twig for the nest. However, a woodpecker's drilling startled it, reminding it of gunfire, and it reconfigured itself into an assault-cannon and began to fire wildly, scaring off Ganymede and destroying the forest around it. Recomposing itself, it found Ganymede's ruined nest on the ground, realized what it had done and sadly continued toward its destination.


Bastion reverts to its old programming
In the meadow between the forest and Stuttgart, Bastion was looking back at the forest as it walked forward, and stubbed its foot on a destroyed Bastion unit, discovering it as one of dozens of other destroyed Bastion units scattered about the meadow. Bastion knelt beside the unit, its head torn open and memory components exposed, and accessed the fallen unit's last memories. Suddenly, Bastion was reliving the war, and saw its fellow Bastion units fighting German soldiers before being wiped out by Balderich von Adler. With new clarity as to its purpose, Bastion reverted to its combat protocol and again marched toward Stuttgart, ready to attack the city. Ganymede found it and landed on it, offering a twig in friendship, just as Bastion had done earlier. Bastion struggled with itself, and finally became peaceful again, placing the twig onto its shoulder, turning away from Stuttgart and back to the forest with Ganymede on its finger.[4]
Binary
| “ | Bastion on the loose? Or just another false alarm? Teen lovers' run-in with death machine! A terror from the past returns! |
„ |
| ~ Swedish headlines on Bastion's sighting |

Bastion emerges
After Bastion's reactivation it was spotted in Sweden by some teens, who got scared when they sighted Bastion, as they thought that it would attack them. As the city's population assembled to discuss what to do, Torbjörn arrived, claiming that he could help with the issue, and asked for the citizens to stay in a safe place; however, a police officer was sent with him after they do some research on the stranger. He set up a trap for the omnic in a form of a ball-shaped rope bomb and his turret, but then Ganymede showed up and flew on top of the rope bomb, which startled the police officer, prompting him to fire his machine pistol, scaring away the omnic and Ganymede, which surprised Torbjörn as a Bastion unit normally couldn't be scared away.
Later on, he found the omnic near a beaver dam, and threw the ball near Bastion, but the omnic gave him a bunch of twigs as a response along with some beeps, making him realize that something is different with the unit. Soon after, the commando unit of the police started to attack Bastion, but it got away before they could do anything other than angering Torbjörn. After failing to restrain him, he detonated the rope bomb and left his attackers tied to the trees.
After restraining his opponents, Torbjörn went off in search of the omnic, and found it observing a flower. Speaking to the omnic, he declared to come in peace and promised not to hurt the omnic; Bastion offered him the flower as a sign of peace, and the duo continued on together.[5]
At some point afterwards, Torbjörn made new armor for Bastion.[6]
Blizzard World

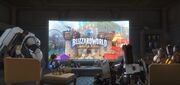
Winston and company see a Blizzard World ad
Alongside Tracer, Winston, and Torbjörn, Bastion watched an ad for Blizzard World.[7]
Achievements
| Name | Icon | Description | Reward |
|---|---|---|---|

|
Kill 2 enemies in each of Bastion's configurations without dying in Quick or Competitive play. | ||

|
Kill 4 enemies with a single use of Bastion's Configuration: Tank in Quick or Competitive play. |  |
Trivia

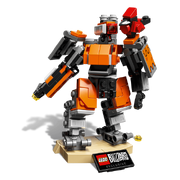
Bastion in LEGO form
- Configuration: Recon used to be called Configuration: Assault.
- Configuration: Sentry used to be called Configuration: Siege. Also it had a 1000 HP front-facing barrier and Bastion had a rotation limit of 60 degrees in frontal cone.
- A Bastion portrait is available in StarCraft II for those who purchased the Origins Edition.[8]
- The Eichenwalde map contains multiple Bastions, dead, the aftermath of the Eichenwalde battle as seen in The Last Bastion short.
- The units at the Eichenwalde map are labeled B73, and where Bastion's hand and repair would be is another recon gun.
- While other omnics such as Zenyatta and Orisa have been shown to identify as male or female, Bastion is so far the only playable omnic confirmed to be genderless[9] and is referred to with 'it' pronouns in official material.[10]
- Bastion appears in LEGO Overwatch in the game's first set.[11]
Development
- Bastion's original Ultimate ability was a remote mine that could be driven like an RC car before burrowing into the ground. This was later changed to Configuration: Tank because Remote Mine didn't feel like it fit the character.[12] A similar mechanic is currently used as Junkrat's RIP-Tire.
- Bastion's Iron Clad ability used to reduce damage by 35%, allowing it to survive Tracer's pulse bomb with 40 health (If on full health), which very few heroes could do. As of Patch 1.9.0.1, it was changed to the current 20% and the Pulse Bomb now does 235 damage to Bastion; a Bastion at full health can now only survive with Brigitte's armor, and before their reworks, Torbjörn's Armor Pack the extra health from Symmetra's Shield Generator.
Videos
Official
Curse
References
- ↑ 2016-06-07, "Bastion is voiced by Chris Metzen, ran through several software plugins and voice modulations.". Reddit (originally from the Overwatch art book). Accessed on 2016-06-23
- ↑ 2.0 2.1 2.2 Bastion's story page, Blizzard Entertainment. Accessed on 2015-03-08
- ↑ 2016-08-16, [https://www.youtube.com/watch?v=QJtxnu5Wmag#t=22m01s "Well, this is the forest where Bastion came from," Youtube.
- ↑ The Last Bastion
- ↑ Bastion: Binary
- ↑ Overwatch, Brigitte Quotes
- ↑ 2017-11-03, Blizzard World | New Hybrid Map | Overwatch. YouTube, accessed on 2017-11-04
- ↑ 2015-11-06, Overwatch: Origins Edition (PC) Pre-Orders have Begun. Blizzplanet, accessed on 2015-11-07
- ↑ 2017-02-09, Michael Chu Twitter. Accessed on 2017-03-03
- ↑ 2016-08-16, Michael Chu Twitter. Accessed on 2017-03-03
- ↑ EGO® Overwatch® Omnic Bastion 75987 Building Kit (182 Pieces), Blizzard Entertainment. Accessed on 2018-12-10
- ↑ Livestream Recap, OVERPWN, Accessed on 2015-13-08
External links
| Heroes in Overwatch 2
| ||||||||||
|---|---|---|---|---|---|---|---|---|---|---|
Bastion |
||||||||||