Lightning Laxus (talk | contribs) No edit summary |
Tag: Visual edit |
||
| (48 intermediate revisions by 17 users not shown) | |||
| Line 23: | Line 23: | ||
| voice ={{VA stack |
| voice ={{VA stack |
||
| english = Genevieve O'Reilly <ref>''[https://twitter.com/westofhouse/status/926650160238575616 Michael Chu on Twitter]""</ref> |
| english = Genevieve O'Reilly <ref>''[https://twitter.com/westofhouse/status/926650160238575616 Michael Chu on Twitter]""</ref> |
||
| − | | other = Déborah Perret (French)<br>Alexandra Lange (German)<br>Mie Sonozaki (Japanese)<br>Lee Mi-na (Korean)<br>Magdalena Cielecka (Polish)<br>Isis Koschdoski (Brazilian Portuguese)<br>Esther Solans (European Spanish)}} |
+ | | other = Déborah Perret (French)<br>Alexandra Lange (German)<br>Li Shirong (Mandarin (China))<br>Mie Sonozaki (Japanese)<br>Lee Mi-na (Korean)<br>Magdalena Cielecka (Polish)<br>Isis Koschdoski (Brazilian Portuguese)<br>Esther Solans (European Spanish)}} |
}} |
}} |
||
'''Moira''' is a [[Support]] [[heroes|hero]] in ''[[Overwatch]]''. |
'''Moira''' is a [[Support]] [[heroes|hero]] in ''[[Overwatch]]''. |
||
| Line 35: | Line 35: | ||
| ability_image = Ability Moira Biotic Grasp.png |
| ability_image = Ability Moira Biotic Grasp.png |
||
| official_description = Using her left hand, Moira expends biotic energy to heal allies in front of her. |
| official_description = Using her left hand, Moira expends biotic energy to heal allies in front of her. |
||
| + | | hero_info_description = Hold to heal all allies in front of you. Consumes biotic energy. |
||
| − | | wiki_description = |
||
| − | | ability_type =Weapon (Primary Fire) |
+ | | ability_type = Weapon (Primary Fire) |
| − | | shot_type = {{proj|beam}} |
+ | | shot_type = {{proj|beam}} |
| + | | heal = 70 per second, then lingers to heal {{tt|35 over 2 seconds|17.5 per second}} |
||
| − | | damage = |
||
| + | | ammo_drain = 12.5 energy per second |
||
| − | | damage_falloff_range = |
||
| + | | ammo = 160 biotic energy |
||
| − | | heal = 80 health per second<br/>{{tt|65 health over 4 seconds (lingering)|Applies when Moira stops healing her target.}} |
||
| + | | duration = 2 seconds (remainder) |
||
| − | | pspeed = 20 meters per second |
||
| − | | ammo_drain = 20 energy per second |
||
| − | | ammo = 180 Biotic Energy |
||
| − | | reload_time = +4.32 energy per second |
||
| − | | duration = 4 seconds (remainder) |
||
| headshot = ✕ |
| headshot = ✕ |
||
| − | | ability_video = |
||
| − | | ability_details = *Can heal multiple allies simultaneously. |
||
| − | *Causes a heal over time that begins upon the last application of the spray healing. This allows Moira to heal without expending resources. |
||
| − | *Does not go through enemy [[barrier]]s. |
||
| cast_time = 0.1 seconds |
| cast_time = 0.1 seconds |
||
| − | | range= 15 meters |
+ | | range = 15 meters |
| + | | ability_details = |
||
| + | * Passes through allies and enemies, but not enemy [[barrier]]s. |
||
| + | * Like {{proj|proj}}, there is travel time for the spray to reach its destination. |
||
| + | * Collision against map geometry and enemy barriers is pinpoint, much like Reinhardts {{al|Fire Strike}}. |
||
| + | * Causes a heal over time that begins upon the last application of the spray healing. This allows Moira to heal without expending resources. |
||
| + | * Regenerates {{tt|3.84 biotic energy|2.4% of the total energy}} per second while inactive. |
||
| + | * Needs at least 8 biotic energy to activate. |
||
| + | }} |
||
{{Ability_details |
{{Ability_details |
||
| Line 58: | Line 58: | ||
| ability_image = Ability Moira Biotic Grasp_Alt fire.png |
| ability_image = Ability Moira Biotic Grasp_Alt fire.png |
||
| official_description = Her right hand fires a long-range beam weapon that saps enemies’ health, healing Moira and replenishing her biotic energy. |
| official_description = Her right hand fires a long-range beam weapon that saps enemies’ health, healing Moira and replenishing her biotic energy. |
||
| + | | hero_info_description = Long range beam weapon. Damage dealt heals you and replenishes your biotic energy. |
||
| − | | wiki_description = |
||
| ability_type = Weapon (Secondary Fire) |
| ability_type = Weapon (Secondary Fire) |
||
| − | | shot_type = {{proj|beam}} |
+ | | shot_type = {{proj|beam}} (no target indicator, soft lock-on) |
| damage = 50 per second |
| damage = 50 per second |
||
| − | | damage_falloff_range = |
||
| heal = 20 per second (self) |
| heal = 20 per second (self) |
||
| − | | |
+ | | ammo = ∞ |
| − | | |
+ | | range = 20 meters |
| − | | ammo = ∞ |
||
| − | | reload_time = |
||
| − | | duration = |
||
| headshot = ✕ |
| headshot = ✕ |
||
| + | | ability_details = |
||
| − | | ability_video = |
||
| + | * Like {{proj|targeted}} line of sight to an enemies center of mass is required to initiate and maintain the attack. |
||
| − | | ability_details = *Self-healing and damage are completely separate. Altering the damage does not affect the self heal. |
||
| + | * Like {{proj|beam}} Biotic Grasp is unaffected by {{al|Deflect}}, {{al|Defense Matrix}}, and {{al|Kinetic Grasp}}. |
||
| − | *Generates ~18.8 Biotic Energy per second. When combined with the passive regeneration, this becomes ~23 per second. |
||
| + | * Self-healing and damage are completely separate. Altering the damage does not affect the self heal. |
||
| − | *Has a very large beam width. |
||
| + | * Generates 21.875 biotic energy per second. When combined with the passive regeneration, this becomes 25.715 biotic energy per second (or 16% per second). |
||
| − | | cast_time = |
||
| + | }} |
||
| − | | range = 20 meters}} |
||
{{Ability_details |
{{Ability_details |
||
| Line 81: | Line 77: | ||
| ability_image = Ability Moira Biotic Orb.png |
| ability_image = Ability Moira Biotic Orb.png |
||
| official_description = Moira launches a rebounding biotic sphere; she can choose between a regeneration effect that heals the allies it passes through, or a decay effect that deals damage to enemies. |
| official_description = Moira launches a rebounding biotic sphere; she can choose between a regeneration effect that heals the allies it passes through, or a decay effect that deals damage to enemies. |
||
| + | | hero_info_description = Launch a bouncing sphere that either heals nearby allies or damages nearby enemies. |
||
| − | | wiki_description = |
||
| − | | ability_type = Ability |
+ | | ability_type = Ability |
| + | | key = ability 2 |
||
| shot_type = {{proj|proj}} |
| shot_type = {{proj|proj}} |
||
| damage = 50 per second, up to {{tt|200|Approx.; actually slightly more}} |
| damage = 50 per second, up to {{tt|200|Approx.; actually slightly more}} |
||
| − | | damage_falloff_range = |
||
| heal = 65 per second, up to {{tt|300|Approx.; actually slightly more}} |
| heal = 65 per second, up to {{tt|300|Approx.; actually slightly more}} |
||
| cooldown = 10 seconds |
| cooldown = 10 seconds |
||
| − | | pspeed = |
+ | | pspeed = 20 meters per second<br>5.5 meters per second while tethered |
| + | | duration = 7 seconds, or until depleted |
||
| − | | fire_rate = |
||
| − | | ammo = |
||
| − | | reload_time = |
||
| − | | duration = 10 seconds, or until depleted |
||
| headshot = ✕ |
| headshot = ✕ |
||
| + | | range = 4 meters (damage orb)<br>5 meters (healing orb) |
||
| − | | ability_video = |
||
| + | | ability_details = |
||
| − | | cast_time = |
||
| + | * Bounces off walls. |
||
| − | | range = 5 meters (tethering) |
||
| + | * Pierces [[barrier]]s, but does not target enemies through them. |
||
| − | | ability_details = *Bounces off walls. |
||
| − | * |
+ | * Damage Orb does not affect enemy [[objects]]. |
| + | * If [[Damage amplification|amplified]], only the rate of damage/healing per second is increased, not the total amount. |
||
| − | *Does not affect traps, turrets, and other deployables. |
||
| − | *If [[Damage amplification|amplified]], the damage or healing per second is increased but not the maximum damage/healing. In other words, the orb depletes faster. |
||
}} |
}} |
||
| Line 107: | Line 99: | ||
| ability_image = Ability Moira Fade.png |
| ability_image = Ability Moira Fade.png |
||
| official_description = Moira's movement speed increases while making her invulnerable to damage. |
| official_description = Moira's movement speed increases while making her invulnerable to damage. |
||
| + | | hero_info_description = Disappear, move faster, and become invulnerable, but you cannot shoot. |
||
| − | | wiki_description = |
||
| − | | ability_type = Ability |
+ | | ability_type = Ability |
| − | | |
+ | | key = ability 1 |
| − | | damage = |
||
| − | | damage_falloff_range = |
||
| cooldown = 6 seconds |
| cooldown = 6 seconds |
||
| − | | heal = |
||
| − | | pspeed = |
||
| − | | fire_rate = |
||
| − | | ammo = |
||
| − | | reload_time = |
||
| duration = 0.8 second |
| duration = 0.8 second |
||
| + | | mspeed = {{tt|+250%|19.25 m/s}} [[movement speed|buff]] |
||
| − | | headshot = |
||
| + | | range = 15 meters (max) |
||
| − | | ability_video = |
||
| + | | ability_details = |
||
| − | | ability_details = *Makes Moira invulnerable and invisible. She can still pick up [[Health Pack]]s. |
||
| + | * Makes Moira invulnerable and invisible. She can still pick up [[Health Pack]]s. |
||
| − | *Cleanses Moira of status and damage over time effects. |
||
| + | * Cleanses Moira of status and damage over time effects. |
||
| − | *Can be used to escape abilities such as [[Graviton Surge]] or [[Gravitic Flux]]. |
||
| + | * Can be used to escape abilities such as [[Graviton Surge]] or [[Gravitic Flux]]. |
||
| − | | cast_time = |
||
| + | }} |
||
| − | | mspeed = {{tt|+250%|19.25 m/s}} [[movement speed|buff]]|range=15 meters (max)}} |
||
{{Ability_details |
{{Ability_details |
||
| Line 131: | Line 116: | ||
| ability_image = Ability Moira Coalescence.png |
| ability_image = Ability Moira Coalescence.png |
||
| official_description = Moira channels a long-range beam that heals allies, damages enemies, and bypasses barriers. |
| official_description = Moira channels a long-range beam that heals allies, damages enemies, and bypasses barriers. |
||
| + | | hero_info_description = Fire a beam that heals allies and damages enemies. |
||
| − | | wiki_description = |
||
| − | | ability_type = Ultimate Ability |
+ | | ability_type = Ultimate Ability |
| shot_type = {{proj|beam}} |
| shot_type = {{proj|beam}} |
||
| damage = 70 per second |
| damage = 70 per second |
||
| + | | heal = 140 per second<br>50 per second (self) |
||
| − | | damage_falloff_range = |
||
| − | | heal = 140 per second<br>50 per second (self) |
||
| − | | pspeed = |
||
| − | | fire_rate = |
||
| − | | ammo = |
||
| − | | reload_time = |
||
| duration = 8 seconds |
| duration = 8 seconds |
||
| headshot = ✕ |
| headshot = ✕ |
||
| − | | ability_video = |
||
| − | | ability_details = *Moira passively generates 1% Ult Charge every 4.76 seconds. |
||
| cast_time = 0.5 seconds |
| cast_time = 0.5 seconds |
||
| mspeed = {{tt|+50%|8.25 m/s}} [[movement speed|buff]] |
| mspeed = {{tt|+50%|8.25 m/s}} [[movement speed|buff]] |
||
| range = 30 meters |
| range = 30 meters |
||
| − | | ult_req = 2380 points |
+ | | ult_req = 2380 points |
| + | }} |
||
==Strategy== |
==Strategy== |
||
| − | Moira is a support hero that can easily reposition amongst her allies with her immense mobility. Though Biotic Grasp's healing isn't a lock-on, nor does it instantly reach the target, it can heal multiple allies simultaneously, granting her higher average healing per second when compared to other supports. However, this powerful healing is limited by a resource meter similar to D.Va's [[Defense Matrix]]; this meter refills very slowly over time, but Biotic Grasp's alternate fire refills it much faster, along with healing Moira herself. Fade provides her a very strong movement tool and invulnerability that makes her very hard to lock down. Biotic Orb can allow Moira to apply both damage and healing at the same time, and is very powerful in enclosed spaces where it will not simply fly past its targets. Coalescence can both heal allies and damage enemies, but perhaps most importantly it can pierce barriers, preventing enemy tanks from blocking your ultimate with various shields. Her alternate fire gives her amazing sustain, particularly in 1v1 fights, and her Fade gives her excellent escapes, greatly aiding her survivability against enemy flankers, though she remains weak to large burst damage such as enemy Snipers or [[Junkrat]]. Her kit, though very strong, lacks the utility other healers provide, making her focused though not particularly versatile. |
||
| − | |||
| − | ===Weapons & Abilities=== |
||
| − | *'''Biotic Grasp:''' Moira's primary weapon. Can either heal allies or damage enemies. |
||
| − | ** ''Primary Fire (healing)'' |
||
| − | ***Fires a short-range stream which heals allies for 80 HP per second in a cylinder in front of her. Unlike other healers, Biotic Grasp's Primary Fire works on a resource system (similar to that of D.Va’s Defense Matrix). Moira can perform 9 seconds of continuous healing before needing to recharge. |
||
| − | ***While not active, Moira's resources will charge slowly over time, or by using her secondary fire on an enemy. |
||
| − | ***When Moira stops healing an ally, they will receive a short regeneration effect that heals 65 HP over 4 seconds. You can use this to preserve your resources by healing in short bursts. |
||
| − | ***Try to mind your resources and not use them on allies at full health. Unlike Mercy's Caduceus Staff, Moira's healing is not infinite. |
||
| − | ***Moira can heal many allies at once by shooting at a group or line of them. |
||
| − | ***Moira is very potent in tight spaces, when her team is clustered together, able to keep everyone topped off fairly easily. |
||
| − | ** ''Secondary Fire (damage)'' |
||
| − | ***Emits a medium-range beam which locks onto the enemy closest to the crosshair. It deals 50 damage per second, and if locked onto an enemy hero, heals Moira for 30 health per second and replenishes Moira’s resources. Unlike her healing spray, the secondary fire can be maintained infinitely at no cost. |
||
| − | ***Don't go for damage too often. Remember that Moira is still a Support hero, and her main priority should be to keep her team alive. |
||
| − | ***Moira’s Secondary Fire has a surprisingly long range, and can be used on heroes like Mercy and Pharah to slowly chip away health. |
||
| − | ***Genji's Deflect and D.Va's Defense Matrix are ineffective against Biotic Grasp, but it can still be blocked by regular shields and Zarya's barriers. |
||
| − | ***Due to its relatively low damage, Moira's secondary fire should not be used on targets like Reinhardt or D.Va unless they are at extremely low health. Instead, prioritize using it on enemies like Tracer and other supports, as they generally have lower health and will retreat when weakened. |
||
| − | ***If you're facing another Moira in combat don't try to kill each other directly unless one is low in health since damage does help increase Moira's health. |
||
| − | ***D.Va's can be eliminated painlessly if you wait until she is out of her MEKA. |
||
| − | |||
| − | *'''Biotic Orb:''' Moira shoots an orb in the direction she is facing, that will either heal all allies or damage all enemies in the area of effect. |
||
| − | **''Mechanics:'' |
||
| − | ***Biotic Orb brings up a UI on use, similar to Reaper's Shadow Step or Mei's Ice Wall. Moira can press primary fire to launch a healing orb, secondary fire to launch a damaging orb, or the first ability key to cancel the move. |
||
| − | ***An orb will affect all viable targets in a five-meter radius around itself. There is no limit to the amount of targets it can affect, but they have a set pool of resources before disappearing (300 healing and 200 damage). Allies at full HP will not drain an orb. |
||
| − | ***Orbs are quite fast, but significantly reduce their speed while affecting targets. Use this to your advantage to weaken a clustered group of enemies (such as during Zarya's Graviton Surge) or heal allies in a tight area. |
||
| − | ***Use orbs to reach targets out of your regular radius, most particularly faraway allies in the midst of battle. |
||
| − | ***Orbs bounce off solid surfaces (but not barriers). While Moira can sometimes use the game's geometry to her advantage, orbs sometimes bounce unpredictably and are not as useful in this way as they would have been by simply firing them straight at a target. |
||
| − | ***Biotic Orb’s hitbox is smaller than it appears, and can clear corners you might not expect. |
||
| − | ***Unlike Biotic Grasp, the damaging variant of Biotic Orb will not restore Moira's resources. |
||
| − | |||
| − | **''Healing Orb:'' |
||
| − | ***'''The Healing Orb is usually Moira's best use of this ability.''' Due to the damaging orb's relatively low damage, it is almost always better to save it to heal your allies. |
||
| − | ***Moira can launch a Healing Orb while her team attacks to soak up some of their incoming damage. |
||
| − | ***Using a Healing Orb on yourself can greatly extend the longevity of your team. A dead healer heals nobody. |
||
| − | ***A Healing Orb will slow down if you launch it at a damaged ally while you yourself are damaged. Be sure to communicate with your team so you aren't spread too far apart. |
||
| − | **''Damage Orb:'' |
||
| − | ***Be mindful of Biotic Orb's cooldown when choosing to throw a Damage Orb. |
||
| − | ***Damage Orbs are of great effect during Zarya's Graviton Surge, as they can pick at all enemies caught in the ultimate for more overall damage. |
||
| − | ***The best use of a Damage Orb is during a one-on-one fight with low-health enemies like Tracer, Mercy, and even an opposing Moira. Launching a Damage Orb and immediately coupling it with your secondary fire can take down low-health enemies quite fast. |
||
| − | ***Use Damage Orbs while your team is attacking to try and out-damage enemy healing. |
||
| − | |||
| − | *'''Fade [Second Ability]:''' Moira becomes intangible and invisible, gaining incredible speed at the cost of all other actions. |
||
| − | **''Mechanics: '' |
||
| − | ***Moira cannot be damaged while in Fade, but she also cannot be healed by her allies. Much like with Tracer's Blink, Moira can pick up health packs while under the effects of Fade. |
||
| − | ***Jumping towards the end of Fade will launch Moira slightly further than normal. Use this to reach your team faster. |
||
| − | ***You have complete freedom of movement during Fade (even during Zarya's Graviton Surge), able to jump, turn around, or even just stand still. |
||
| − | ***Fade typically ''only'' grants horizontal movement, but it can be used to save Moira if she is knocked off a ledge, provided she's close enough. |
||
| − | ****By jumping off of certain obstacles during Fade, it ''is'' possible to gain a degree of vertical movement, though this movement option is situational at best. [https://www.youtube.com/watch?v=te1vV4F6YDQ Here] is a video that explains the concept and also demonstrates numerous places on most maps where this trick can be performed. |
||
| − | **''Uses of Fade:'' |
||
| − | ***Use Fade to avoid lethal damage, such as D.Va's Self Destruct and Tracer's Pulse Bomb. Due to Fade's quick speed, this can take some practice to get the timing down. '''Remember, you should still retreat into cover in case your timing is off.''' |
||
| − | ***There's no shame in pulling back. If you're surrounded by enemies, Fade can be used to disengage and regroup with your team. |
||
| − | ***Fade is a key part in keeping your team alive. Retreat behind shields or use your powerful mobility to reach your team quickly. |
||
| − | ***Don't use Fade to jump into battle haphazardly. It has a fairly long cooldown and Moira is quite vulnerable on her own. |
||
| − | |||
| − | *'''Coalescence (Ultimate):''' Moira channels a beam in front of her to heal allies and damage enemies. |
||
| − | **''Mechanics:'' |
||
| − | ***Coalescence creates a long-range beam of ally-healing and enemy-damaging energy. Much like Zarya's primary fire, it follows your cursor with no delay and goes straight ahead. |
||
| − | ***The beam will pierce through all enemies and shields in a 30-meter range. |
||
| − | ***Coalescence provides both 140 healing per second and 70 damage per second to allies and enemies respectively. |
||
| − | ***While in use, Moira has increased speed and health regeneration (50 HP per second). |
||
| − | ***Moira cannot perform any other action — including Fade — while using Coalescence. |
||
| − | **''Using Coalescence:'' |
||
| − | ***Coalescence is a relatively low-priority ultimate due to its only mild utility and quick charge. Use it liberally, but intelligently. |
||
| − | ***Due to the shape of the beam, Coalescence works best either in tight areas or clustered allies/enemies. |
||
| − | ***The damage provided from Coalescence is mediocre, so prioritize healing with it over dealing damage. That said, it is an excellent tool against Pharah and Mercy if your team lacks any other way to deal with them. |
||
| − | ***Coalescence’s healing is not enough to outpace most offensive ultimates. Trying to heal through a Tactical Visor or Death Blossom will only get you and your team killed. Instead, use it to help guide your team into cover, since it will still slow down their damage. |
||
| − | ***Be careful when you choose to use this Ultimate. Moira is totally vulnerable while it is active, and being stunned or hacked will negate it completely. |
||
| − | ***A good tactic when healing with Coalescence can be to send out a Healing Orb first, and then activate your ultimate. |
||
| − | ***Coalescence is more effective in damage if team opponents are grouped up. |
||
| − | ***When moving Moira around during coalescence it's better if she is steady in her movement. |
||
| + | Moira is a support hero that can easily reposition amongst her allies with her immense mobility. {{al|Biotic Grasp}} can heal multiple allies simultaneously, granting her higher average healing per second when compared to other supports. However, this powerful healing is limited by a resource meter similar to D.Va's [[Defense Matrix]]; this meter refills very slowly over time, but Biotic Grasp's alternate fire refills it much faster, along with healing Moira herself. {{al|Fade}} provides her a very strong movement tool and invulnerability that makes her very hard to lock down. {{al|Biotic Orb}} can allow Moira to apply both damage and healing at the same time, and is very powerful in enclosed spaces where it will not simply fly past its targets. {{al|Coalescence}} can both heal allies and damage enemies, but perhaps most importantly it can pierce [[barrier]]s, preventing enemy tanks from blocking your ultimate with various shields. Her alternate fire gives her amazing sustain, particularly in 1v1 fights, and her {{al|Fade}} gives her excellent escapes, greatly aiding her survivability against enemy flankers, though she remains weak to large burst damage such as enemy Snipers or [[Junkrat]]. Her kit, though very strong, lacks the utility other healers provide, making her focused though not particularly versatile.<br /> |
||
===General Strategies=== |
===General Strategies=== |
||
*''Priorities:'' |
*''Priorities:'' |
||
**<u>0. Think</u> - the list below is not set in stone. During a course of teamfight you must make your own decisions based on the circumstances you are facing. |
**<u>0. Think</u> - the list below is not set in stone. During a course of teamfight you must make your own decisions based on the circumstances you are facing. |
||
| − | **<u>1. Your own safety</u> – while keeping your team alive is a reason you play healer, if you die your allies will soon follow, as they will not have a way to sustain themselves in a teamfight. Use Fade to avoid attackers and dodge lethal damage and keep your health high with the combination of basic abilities. |
+ | **<u>1. Your own safety</u> – while keeping your team alive is a reason you play healer, if you die your allies will soon follow, as they will not have a way to sustain themselves in a teamfight. Use {{al|Fade}} to avoid attackers and dodge lethal damage and keep your health high with the combination of basic abilities. |
| − | **<u>2. Healing ally in immediate risk of dying</u> - when one of your teammates is receiving damage very quickly or is on low health, you should prioritize healing them to prevent their death. Biotic Grasp is one of the strongest healing effects in the game, and will be able to outheal many sources of damage. Be careful with using Biotic Orb in these situations though – time that is needed to cast it and resume healing with Primary Fire may cost your ally life. |
+ | **<u>2. Healing ally in immediate risk of dying</u> - when one of your teammates is receiving damage very quickly or is on low health, you should prioritize healing them to prevent their death. {{al|Biotic Grasp}} is one of the strongest healing effects in the game, and will be able to outheal many sources of damage. Be careful with using {{al|Biotic Orb}} in these situations though – time that is needed to cast it and resume healing with Primary Fire may cost your ally life. |
| − | **<u>3. Healing a group of allies</u> - when multiple allies take spread damage while standing close to each other, Moira is the best healer to deal with it. |
+ | **<u>3. Healing a group of allies</u> - when multiple allies take spread damage while standing close to each other, Moira is the best healer to deal with it. The combination of {{al|Biotic Grasp}} and {{al|Biotic Orb|Orb}} healing effects will allow you to reach a short burst of a stunning 140 health per second healing. This will outpace nearly all non-Ultimate damage that enemies may throw at you. Healing in this scenario charges Moira’s ultimate at break-neck pace. |
| − | **<u>4. Damaging low health targets</u> - Moira’s lock-on Secondary Fire and damaging Biotic Orb will allow her to fairly effectively |
+ | **<u>4. Damaging low health targets</u> - Moira’s lock-on {{al|Biotic Grasp|Secondary Fire}} and damaging {{al|Biotic Orb}} will allow her to fairly effectively secure eliminations on low health enemies. If the target is receiving any healing though, Moira’s damage alone is likely not going to be enough to burn through their healthpool. |
| − | **<u>5. Damage enemies |
+ | **<u>5. Damage enemies that are not behind barriers</u> - it will allow you to recharge your healing resource quicker, heal yourself and help your damage dealers in burning targets down. This also builds up your ultimate charge. When you are certain that the enemy will not engage in the next 10 seconds, you may also use your {{al|Biotic Orb}} to harass targets behind barriers. |
| − | **<u>6. Damage barriers</u> - to put it simply: it’s not your job and you are terrible at it. If there is precisely nothing else for you to do, you may attack barriers with your Secondary Fire, but it will neither heal you nor restore your healing resource. |
+ | **<u>6. Damage barriers</u> - to put it simply: it’s not your job and you are terrible at it. If there is precisely nothing else for you to do, you may attack barriers with your {{al|Biotic Grasp|Secondary Fire}}, but it will neither heal you nor restore your healing resource. |
==Match-Ups and Team Synergy== |
==Match-Ups and Team Synergy== |
||
| Line 244: | Line 154: | ||
|- |
|- |
||
|<center>[[Image:icon-dva.png|75px|link=http://overwatch.gamepedia.com/D.Va]]<br />[[D.Va]]</center> |
|<center>[[Image:icon-dva.png|75px|link=http://overwatch.gamepedia.com/D.Va]]<br />[[D.Va]]</center> |
||
| + | |<small>D.Va is able to make Moira less effective with her Defense Matrix which will destroy her Biotic Orbs. With her high armour HP, it is not advised to attack D.Va with Biotic Grasp, instead leave D.Va for your team to deal with. If a teammate is under attack by D.Va, you can mostly negate her damage with Biotic Grasp, however she can outdamage the healing if she is close enough & accurate, so a Biotic Orb will be needed to keep your teammate alive if she is too close.</small> |
||
| − | |<small>(To be added)</small> |
||
|<small>(To be added)</small> |
|<small>(To be added)</small> |
||
|- |
|- |
||
| Line 252: | Line 162: | ||
|- |
|- |
||
|<center>[[Image:icon-reinhardt.png|75px|link=http://overwatch.gamepedia.com/Reinhardt]]<br />[[Reinhardt]]</center> |
|<center>[[Image:icon-reinhardt.png|75px|link=http://overwatch.gamepedia.com/Reinhardt]]<br />[[Reinhardt]]</center> |
||
| + | |<small>Moira can't reliably apply pressure to Reinhardt with her low damage, and Reinhardt's armour will decrease her damage. Instead focus on baiting out his shatter by standing in front of him, then using Fade when you hear him using Earthshatter.</small> |
||
| − | |<small>(To be added)</small> |
||
|<small>(To be added)</small> |
|<small>(To be added)</small> |
||
|- |
|- |
||
|<center>[[Image:icon-roadhog.png|75px|link=http://overwatch.gamepedia.com/Roadhog]]<br />[[Roadhog]]</center> |
|<center>[[Image:icon-roadhog.png|75px|link=http://overwatch.gamepedia.com/Roadhog]]<br />[[Roadhog]]</center> |
||
| + | |<small>You should never try to take on a Roadhog as Moira, as he can easily outheal your damage & hook combo you. Try to bait his Hook with Fade so it is easier for your team to deal with him. Always stay far away from Roadhog & with your team so you don't get Hooked.</small> |
||
| − | |<small>(To be added)</small> |
||
|<small>(To be added)</small> |
|<small>(To be added)</small> |
||
|- |
|- |
||
| Line 264: | Line 174: | ||
|- |
|- |
||
|<center>[[Image:icon-wrecking_ball.png|75px|link=http://overwatch.gamepedia.com/Wrecking Ball]]<br />[[Wrecking Ball]]</center> |
|<center>[[Image:icon-wrecking_ball.png|75px|link=http://overwatch.gamepedia.com/Wrecking Ball]]<br />[[Wrecking Ball]]</center> |
||
| + | |Going after Wrecking Ball with Moira is pointless, you will just be wasting your time. Only go for him if he is low, and make sure you watch your other support & immediately heal them if Wrecking Ball pile drives them. |
||
| − | |<small>(To be added)</small> |
||
|<small>(To be added)</small> |
|<small>(To be added)</small> |
||
|- |
|- |
||
|<center>[[Image:icon-winston.png|75px|link=http://overwatch.gamepedia.com/Winston]]<br />[[Winston]]</center> |
|<center>[[Image:icon-winston.png|75px|link=http://overwatch.gamepedia.com/Winston]]<br />[[Winston]]</center> |
||
| + | |Winston makes it much harder for Moira to heal with his bubble. Winston only just outdamages Moira's healing, so if a teammate is under attack by Winston, you can potentially save them if you keep heals on them. |
||
| − | |<small>(To be added)</small> |
||
|<small>(To be added)</small> |
|<small>(To be added)</small> |
||
|- |
|- |
||
|<center>[[Image:icon-zarya.png|75px|link=http://overwatch.gamepedia.com/Zarya]]<br />[[Zarya]]</center> |
|<center>[[Image:icon-zarya.png|75px|link=http://overwatch.gamepedia.com/Zarya]]<br />[[Zarya]]</center> |
||
| + | |<small>Zarya can be easily taken out with Moira if she is not charged, otherwise you should not engage as she can outdamage your self-heal easily.</small> |
||
| − | |<small>(To be added)</small> |
||
|<small>(To be added)</small> |
|<small>(To be added)</small> |
||
| Line 286: | Line 196: | ||
|- |
|- |
||
|<center>[[Image:icon-ashe.png|75px|link=http://overwatch.gamepedia.com/Ashe]]<br />[[Ashe]]</center> |
|<center>[[Image:icon-ashe.png|75px|link=http://overwatch.gamepedia.com/Ashe]]<br />[[Ashe]]</center> |
||
| + | |<small>Use Fade to negate Dynamite's damage, or to move closer to Ashe when she uses her Coach Gun. You can then finish her off with Biotic Grasp & Bitotic Orb combo.</small> |
||
| − | |<small>(To be added)</small> |
||
|<small>(To be added)</small> |
|<small>(To be added)</small> |
||
|- |
|- |
||
|<center>[[Image:icon-bastion.png|75px|link=http://overwatch.gamepedia.com/Bastion]]<br />[[Bastion]]</center> |
|<center>[[Image:icon-bastion.png|75px|link=http://overwatch.gamepedia.com/Bastion]]<br />[[Bastion]]</center> |
||
| + | |When in turret form, Moira's damage is next to useless against Bastion. Try to focus on healing whoever is attacking the enemy bastion - you can throw a damage orb if your team is diving the Bastion to cancel out his self-healing. |
||
| − | |<small>(To be added)</small> |
||
|<small>(To be added)</small> |
|<small>(To be added)</small> |
||
|- |
|- |
||
|<center>[[Image:icon-doomfist.png|75px|link=http://overwatch.gamepedia.com/Doomfist]]<br />[[Doomfist]]</center> |
|<center>[[Image:icon-doomfist.png|75px|link=http://overwatch.gamepedia.com/Doomfist]]<br />[[Doomfist]]</center> |
||
| + | |Doomfist can be easily evaded with Fade, however his shields can make finishing him off an issue. Try to use Fade to dodge his seismic slam combo instead of Rocket Punch, as Rocket Punch can be baited by walking in one direction then moving in another. You can manipulate Doomfist's Uppercut into positioning yourself on the high ground, simply use Fade while in the air to move out of his danger zone. |
||
| − | |<small>(To be added)</small> |
||
|<small>(To be added)</small> |
|<small>(To be added)</small> |
||
|- |
|- |
||
|<center>[[Image:icon-genji.png|75px|link=http://overwatch.gamepedia.com/Genji]]<br />[[Genji]]</center> |
|<center>[[Image:icon-genji.png|75px|link=http://overwatch.gamepedia.com/Genji]]<br />[[Genji]]</center> |
||
| + | |<small>Genji is no problem for Moira to kill, make sure you dodge his Dash with Fade, then throw a Damage Orb to his location & focus Biotic Grasp on him. If he uses dragonblade, use Coalescence on whoever he is targeting to negate his damage & save that teammate. This won't work if he is nanoboosted, unless you have an Ana which will increase the healing with Biotic Grenade.</small> |
||
| − | |<small>(To be added)</small> |
||
|<small>(To be added)</small> |
|<small>(To be added)</small> |
||
|- |
|- |
||
|<center>[[Image:icon-hanzo.png|75px|link=http://overwatch.gamepedia.com/Hanzo]]<br />[[Hanzo]]</center> |
|<center>[[Image:icon-hanzo.png|75px|link=http://overwatch.gamepedia.com/Hanzo]]<br />[[Hanzo]]</center> |
||
| + | |<small>Hanzo can be a huge problem for Moira, though if you catch him off guard & without Lunge, you can combo Biotic Grasp + Biotic Orb to quickly take him down, though you should strafe & crouch randomly so he doesn't headshot you.</small> |
||
| − | |<small>(To be added)</small> |
||
|<small>(To be added)</small> |
|<small>(To be added)</small> |
||
|- |
|- |
||
|<center>[[Image:icon-junkrat.png|75px|link=http://overwatch.gamepedia.com/Junkrat]]<br />[[Junkrat]]</center> |
|<center>[[Image:icon-junkrat.png|75px|link=http://overwatch.gamepedia.com/Junkrat]]<br />[[Junkrat]]</center> |
||
| + | |Junkrat is dangerous at close range as you cannot heal yourself quickly enough if taking hits from his bombs. Keep a medium range distance while draining him with Biotic Grasp; he can easily dodge your Damage Orb with his Concussion Mines, so don't waste your Orb. |
||
| − | |<small>(To be added)</small> |
||
|<small>(To be added)</small> |
|<small>(To be added)</small> |
||
|- |
|- |
||
|<center>[[Image:icon-mccree.png|75px|link=http://overwatch.gamepedia.com/McCree]]<br />[[McCree]]</center> |
|<center>[[Image:icon-mccree.png|75px|link=http://overwatch.gamepedia.com/McCree]]<br />[[McCree]]</center> |
||
| + | |<small>McCree can be an issue as it is relatively easy for him to hit you. You can move forward toward McCree while strafing & bait out his Flashbang with Fade, which makes him much easier for your team to finish off.</small> |
||
| − | |<small>(To be added)</small> |
||
|<small>(To be added)</small> |
|<small>(To be added)</small> |
||
|- |
|- |
||
|<center>[[Image:icon-mei.png|75px|link=http://overwatch.gamepedia.com/Mei]]<br />[[Mei]]</center> |
|<center>[[Image:icon-mei.png|75px|link=http://overwatch.gamepedia.com/Mei]]<br />[[Mei]]</center> |
||
| + | |Keep your distance & don't let her get more than 1 icicle on you. If you're hit, Fade away to cover & wait for your cooldowns to reset. You can save a teammate with Biotic Grasp + Biotic Orb if they are frozen, but you have to be quick. Don't let her get close if you don't have Fade, as you will not be able to deal enough damage to kill her, nor will your self-healing be able to save you. |
||
| − | |<small>(To be added)</small> |
||
|<small>(To be added)</small> |
|<small>(To be added)</small> |
||
|- |
|- |
||
|<center>[[Image:icon-pharah.png|75px|link=http://overwatch.gamepedia.com/Pharah]]<br />[[Pharah]]</center> |
|<center>[[Image:icon-pharah.png|75px|link=http://overwatch.gamepedia.com/Pharah]]<br />[[Pharah]]</center> |
||
| + | |Since Moira's Biotic Grasp has medium range, you can attack Pharah while she's in the air, though you should focus more on healing a hitscan who can reliably damage the Pharah. Try to lure her into an area where your Damage Orb can hit her, otherwise stay away as she can easily burst you down. |
||
| − | |<small>(To be added)</small> |
||
|<small>(To be added)</small> |
|<small>(To be added)</small> |
||
|- |
|- |
||
|<center>[[Image:icon-reaper.png|75px|link=http://overwatch.gamepedia.com/Reaper]]<br />[[Reaper]]</center> |
|<center>[[Image:icon-reaper.png|75px|link=http://overwatch.gamepedia.com/Reaper]]<br />[[Reaper]]</center> |
||
| + | |<small>You will do very little to Reaper if he is close to you, as he will outheal most of your damage. Do not waste Fade as Reaper can then Wraith Form up to you & finish you off, instead try to move toward your team & allow them to deal with Reaper. If in a 1v1 situation, you will want to stay as far away as possible, while slowly draining his health.</small> |
||
| − | |<small>(To be added)</small> |
||
|<small>(To be added)</small> |
|<small>(To be added)</small> |
||
|- |
|- |
||
|<center>[[Image:icon-Soldier 76.png|75px|link=http://overwatch.gamepedia.com/Soldier:_76]]<br />[[Soldier: 76]]</center> |
|<center>[[Image:icon-Soldier 76.png|75px|link=http://overwatch.gamepedia.com/Soldier:_76]]<br />[[Soldier: 76]]</center> |
||
| + | |You will deal very little damage to Soldier: 76 if he is using his Biotic Field - try to wait it out, or bounce a Damage Orb around him. It is a much better strategy to heal yourself with a Healing Orb as he can easily kill you with his Helix Rockets if you're even somewhat damaged. |
||
| − | |<small>(To be added)</small> |
||
|<small>(To be added)</small> |
|<small>(To be added)</small> |
||
|- |
|- |
||
|<center>[[Image:icon-sombra.png|75px|link=http://overwatch.gamepedia.com/Sombra]]<br />[[Sombra]]</center> |
|<center>[[Image:icon-sombra.png|75px|link=http://overwatch.gamepedia.com/Sombra]]<br />[[Sombra]]</center> |
||
| + | |As Sombra's damage is relatively low, you can easily outdamage her & still have plenty of health left from self-healing. Moira can be good at countering Sombra since you can spin around & quickly cancel her hack. |
||
| − | |<small>(To be added)</small> |
||
|<small>(To be added)</small> |
|<small>(To be added)</small> |
||
|- |
|- |
||
|<center>[[Image:icon-symmetra.png|75px|link=http://overwatch.gamepedia.com/Symmetra]]<br />[[Symmetra]]</center> |
|<center>[[Image:icon-symmetra.png|75px|link=http://overwatch.gamepedia.com/Symmetra]]<br />[[Symmetra]]</center> |
||
| + | |<small>You can quickly destroy Symmetra's turrets, clearing the area for your team & minimising damage. The range of Biotic Grasp is about double of her laser, meaning keeping yourself at the maximum range of the grasp is a good idea. Additionally, you can use Fade to safely pass her turrets; if she is uncharged then it is quite easy to kill her since your lifesteal will heal most of the damage.</small> |
||
| − | |<small>(To be added)</small> |
||
|<small>(To be added)</small> |
|<small>(To be added)</small> |
||
|- |
|- |
||
|<center>[[Image:icon-torbjörn.png|75px|link=http://overwatch.gamepedia.com/Torbjörn]]<br />[[Torbjörn]]</center> |
|<center>[[Image:icon-torbjörn.png|75px|link=http://overwatch.gamepedia.com/Torbjörn]]<br />[[Torbjörn]]</center> |
||
| + | |The turret will be a problem for Moira as you cannot steal health when attacking it, along with Torb's armour which decreases your damage, he isn't a viable target for Moira. You can use a healing orb while attacking the turret at the cost of giving him ultimate charge. Try to leave this to another teammate. |
||
| − | |<small>(To be added)</small> |
||
|<small>(To be added)</small> |
|<small>(To be added)</small> |
||
|- |
|- |
||
|<center>[[Image:icon-tracer.png|75px|link=http://overwatch.gamepedia.com/Tracer]]<br />[[Tracer]]</center> |
|<center>[[Image:icon-tracer.png|75px|link=http://overwatch.gamepedia.com/Tracer]]<br />[[Tracer]]</center> |
||
| + | |Make sure to keep Fade ready when she has Pulse Bomb, and if she gets too close & deals too much damage, Fade away & cast a Healing Orb, along with keeping Biotic Grasp on her for 70 Healing p/s on yourself. This makes winning the 1v1 with Tracer much easier, as she will have to disengage to get health kits. If you know she has no more blinks left, you can chase her down with Fade & easily finish her off, but be careful not to get baited into a Pulse Bomb! |
||
| − | |<small>(To be added)</small> |
||
|<small>(To be added)</small> |
|<small>(To be added)</small> |
||
|- |
|- |
||
|<center>[[Image:icon-widowmaker.png|75px|link=http://overwatch.gamepedia.com/Widowmaker]]<br />[[Widowmaker]]</center> |
|<center>[[Image:icon-widowmaker.png|75px|link=http://overwatch.gamepedia.com/Widowmaker]]<br />[[Widowmaker]]</center> |
||
| + | |<small>You shouldn't try to take on a Widowmaker, leave it to your team. However if you're feeling ballsy, you can Fade & dive Widow, cast a Damage Orb, and use Biotic Grasp to easily bring her HP to 0. If she is being pocketed or a healer is near her, you shouldn't try this as it is suicide.</small> |
||
| − | |<small>(To be added)</small> |
||
|<small>(To be added)</small> |
|<small>(To be added)</small> |
||
|} |
|} |
||
| Line 360: | Line 270: | ||
|- |
|- |
||
|<center>[[Image:icon-ana.png|75px|link=http://overwatch.gamepedia.com/Ana]]<br />[[Ana]]</center> |
|<center>[[Image:icon-ana.png|75px|link=http://overwatch.gamepedia.com/Ana]]<br />[[Ana]]</center> |
||
| + | |If you're going to attack Ana with Moira, you can bait out her Biotic Grenade as it is fairly obvious when Ana is going to use it (looking at the ground & moving toward you). |
||
| − | |<small>(To be added)</small> |
||
| + | It is then very easy to finish her off unless she gets some well placed shots. Try to save Fade for dodging Sleep Dart or Biotic Grenade, though if only dodging one, make sure you move further away so it is easier to dodge Ana's other projectile ability. |
||
| − | |<small>(To be added)</small> |
||
| + | |<small>Ana's Biotic Grenade combined with Moira's Coalescence equals a lot of healing, and can even negate a NanoBoosted Genji's Dragonblade.</small> |
||
|- |
|- |
||
|<center>[[Image:icon-baptiste.png|75px|link=http://overwatch.gamepedia.com/Baptiste]]<br />[[Baptiste]]</center> |
|<center>[[Image:icon-baptiste.png|75px|link=http://overwatch.gamepedia.com/Baptiste]]<br />[[Baptiste]]</center> |
||
| + | |<small>When battling Baptiste, you need to wait out his Immortality Field as you will not be able to destroy it in time with Biotic Grasp. Once his Immortality Field is down, he is a free kill for Moira.</small> |
||
| − | |<small>(To be added)</small> |
||
|<small>(To be added)</small> |
|<small>(To be added)</small> |
||
|- |
|- |
||
|<center>[[Image:icon-brigitte.png|75px|link=http://overwatch.gamepedia.com/Brigitte]]<br />[[Brigitte]]</center> |
|<center>[[Image:icon-brigitte.png|75px|link=http://overwatch.gamepedia.com/Brigitte]]<br />[[Brigitte]]</center> |
||
| + | |<small>Never let Brigitte get close to you, always keep your distance & focus on healing instead of going after her, as you can easily outheal her damage. If she can't get close to you, it's a free kill.</small> |
||
| − | |<small>(To be added)</small> |
||
|<small>(To be added)</small> |
|<small>(To be added)</small> |
||
|- |
|- |
||
|<center>[[Image:icon-lúcio.png|75px|link=http://overwatch.gamepedia.com/Lúcio]]<br />[[Lúcio]]</center> |
|<center>[[Image:icon-lúcio.png|75px|link=http://overwatch.gamepedia.com/Lúcio]]<br />[[Lúcio]]</center> |
||
| + | |You can easily burn down Lucio with Biotic Grasp, though you shouldn't throw a Damage Orb at him as he can quickly speed away. Make sure to not use Coalescence if you know he has his ultimate, as it will nullify your damage. Once he has used his ultimate, wait a few seconds before casting a Damage Orb & Coalescence to burn down any enemies near you, and to keep your team alive if needed. |
||
| − | |<small>(To be added)</small> |
||
|<small>(To be added)</small> |
|<small>(To be added)</small> |
||
|- |
|- |
||
|<small><center>[[Image:icon-mercy.png|75px|link=http://overwatch.gamepedia.com/Mercy]]<br />[[Mercy]]</center> |
|<small><center>[[Image:icon-mercy.png|75px|link=http://overwatch.gamepedia.com/Mercy]]<br />[[Mercy]]</center> |
||
| + | |<small>If the situation allows it, make Mercy your primary target with your Biotic Orb, Biotic Grasp, or Coalescence, as she is easy to burn down with these abilities, unless she is flying around with a Pharah or Echo. Moira is a very effective hero against Mercy.</small> |
||
| − | |<small>(To be added)</small> |
||
|<small>(To be added)</small> |
|<small>(To be added)</small> |
||
|- |
|- |
||
|<center>[[Image:icon-moira.png|75px|link=http://overwatch.gamepedia.com/Moira]]<br />[[Moira]]</center> |
|<center>[[Image:icon-moira.png|75px|link=http://overwatch.gamepedia.com/Moira]]<br />[[Moira]]</center> |
||
| + | |Always use Coalescence AFTER the enemy Moira, this will ensure you have more heals and a better chance at winning, though this may not be possible for every situation if a teammate is in trouble (e.g. in a Graviton Surge). |
||
| − | |<small>(To be added)</small> |
||
| + | For 1v1, you will want to stay in an area where you can reliably bounce your Orb while moving randomly to reduce damage dealt to you & the enemy Moira's healing. Healing orb is favoured over Damage Orb, but this can make the 1v1 last a long time. Once the enemy Moira casts Coalescence, use your Damage Orb & Coalescence to quickly burn her down. |
||
|<small>(To be added)</small> |
|<small>(To be added)</small> |
||
|- |
|- |
||
|<center>[[Image:icon-zenyatta.png|75px|link=http://overwatch.gamepedia.com/Zenyatta]]<br />[[Zenyatta]]</center> |
|<center>[[Image:icon-zenyatta.png|75px|link=http://overwatch.gamepedia.com/Zenyatta]]<br />[[Zenyatta]]</center> |
||
| + | |<small>Since Zenyatta has no mobility you can easily burn him down with Biotic Grasp & Damage Orb, but be careful as he can easily kill you with a few well placed shots. Save your Fade to remove his Orb of Discord then resume attacking him - he will be forced to reapply the Orb of Discord which will slow him down slightly.</small> |
||
| − | |<small>(To be added)</small> |
||
|<small>(To be added)</small> |
|<small>(To be added)</small> |
||
|} |
|} |
||
| Line 414: | Line 326: | ||
===New Employers=== |
===New Employers=== |
||
{{Quote|We stand on the brink of a breakthrough in human evolution. I've dedicated my life to unraveling its secrets. I take risks that others would consider to be unwise for I do not share their caution. Overwatch held back the pace of scientific discovery for decades. They believed my methods were too radical, too controversial. They tried to silence me. But there were others in the shadows, searching for ways to circumvent their rules. Freed from my shackles, the pace of our research hastened. Together we delved deeper into those areas forbidden by law, by morality, and by fear. New patrons emerged who possessed an appetite for my discoveries. And with this knowledge, what new world could we build...|Moira O'Deorain}} |
{{Quote|We stand on the brink of a breakthrough in human evolution. I've dedicated my life to unraveling its secrets. I take risks that others would consider to be unwise for I do not share their caution. Overwatch held back the pace of scientific discovery for decades. They believed my methods were too radical, too controversial. They tried to silence me. But there were others in the shadows, searching for ways to circumvent their rules. Freed from my shackles, the pace of our research hastened. Together we delved deeper into those areas forbidden by law, by morality, and by fear. New patrons emerged who possessed an appetite for my discoveries. And with this knowledge, what new world could we build...|Moira O'Deorain}} |
||
| + | |||
| + | O'Deorain may have had a direct role in saving Reyes's life after the blast that consumed [[Overwatch HQ]]. Whatever the case, her experiments on him kept him alive, albeit in a state of agony.<ref name = "MoiraQuotes">''[[Overwatch]]'', ''[[Moira/Quotes|Moira Quotes]]''</ref> |
||
| + | |||
[[File:MoiraOrigin2.jpg|thumb|O'Deorain, now a member of Talon]] |
[[File:MoiraOrigin2.jpg|thumb|O'Deorain, now a member of Talon]] |
||
After Overwatch was disbanded, O'Deorain was forced to turn to unconventional sources of funding.<ref name = "StoryMoira"/> This time, she was invited to join the scientific collective that had founded the city of [[Oasis]], and was selected to be their Minister of Genetics.<ref name="Blizzcon 2017">2017-11-3, Blizzcon 2017 Overwatch: What's New Panel</ref> Yet some whispered that the shadowy [[Talon]] organization had already been supporting her for years, aiding her experiments in exchange for utilizing the results for their own purposes.<ref name = "StoryMoira"/> By the time of [[Doomfist]]'s return to Talon (or after his return), Moira apparently had a seat on Talon's inner council.<ref name = "OriginMoira"/> O'Deorain's goals of pushing forward human evolution meshed well with Talon's, and she found a patron for her research in Doomfist.<ref name = "2017Next"/> |
After Overwatch was disbanded, O'Deorain was forced to turn to unconventional sources of funding.<ref name = "StoryMoira"/> This time, she was invited to join the scientific collective that had founded the city of [[Oasis]], and was selected to be their Minister of Genetics.<ref name="Blizzcon 2017">2017-11-3, Blizzcon 2017 Overwatch: What's New Panel</ref> Yet some whispered that the shadowy [[Talon]] organization had already been supporting her for years, aiding her experiments in exchange for utilizing the results for their own purposes.<ref name = "StoryMoira"/> By the time of [[Doomfist]]'s return to Talon (or after his return), Moira apparently had a seat on Talon's inner council.<ref name = "OriginMoira"/> O'Deorain's goals of pushing forward human evolution meshed well with Talon's, and she found a patron for her research in Doomfist.<ref name = "2017Next"/> |
||
==Achievements== |
==Achievements== |
||
| + | {{AchievementTable/Start}} |
||
| − | {| class="wikitable" style="width:900px" |
||
| + | {{Achievement|Antipode|Ability Moira Coalescence.png|Hit 7 targets simultaneously with Moira's Coalescence in Quick or Competitive play.|Spray Moira Cute.png|Cute}} |
||
| − | |- |
||
| + | {{Achievement|Simple Trigonometry|Ability Moira Biotic Orb.png|Fully deplete both types of Moira's Biotic Orb without dying in Quick or Competitive play.|Spray Moira Pixel.png|Pixel}} |
||
| − | ! style="width:200px" |Name |
||
| + | {{AchievementTable/End}} |
||
| − | ! style="width:100px" |Icon |
||
| − | ! style="width:500px" |Description |
||
| − | ! style="width:100px" |Reward |
||
| − | |- |
||
| − | |<center>''Antipode''</center> |
||
| − | |[[File:Ability Moira Coalescence.png|100px]] |
||
| − | |Hit 7 targets simultaneously with Moira's Coalescence in Quick or Competitive play. |
||
| − | |[[File:Spray Moira Cute.png|100x100px]]<br><center>'''Cute'''</center> |
||
| − | |- |
||
| − | |<center>''Simple Trigonometry''</center> |
||
| − | |[[File:Ability Moira Biotic Orb.png|100px]] |
||
| − | |Fully deplete both types of Moira's Biotic Orb without dying in Quick or Competitive play. |
||
| − | |[[File:Spray Moira Pixel.png|100x100px]]<br><center>'''Pixel'''</center> |
||
| − | |} |
||
==Trivia== |
==Trivia== |
||
| Line 442: | Line 344: | ||
* The day before her reveal, a research paper labeled "Draft: Repairing Degenerative Genetic Structures" was added to the [[Oasis]] map, hinting at Moira's occupation and involvement with [[Reaper]]. |
* The day before her reveal, a research paper labeled "Draft: Repairing Degenerative Genetic Structures" was added to the [[Oasis]] map, hinting at Moira's occupation and involvement with [[Reaper]]. |
||
* There is a story behind Moira's decrepit right hand, hinted to be the result of coming into contact with an anomalous genetic experiment, however, it seems it still doesn't hint at explanation how those genetics are able to allow plasma production in a biotic system.<ref name="Blizzcon 2017"/> |
* There is a story behind Moira's decrepit right hand, hinted to be the result of coming into contact with an anomalous genetic experiment, however, it seems it still doesn't hint at explanation how those genetics are able to allow plasma production in a biotic system.<ref name="Blizzcon 2017"/> |
||
| + | *Excluding Mercy, who uses both hands to hold her healing staff, Moira is the only Support Hero to heal with her left hand. This references her twisted nature because the left side is traditionally associated with evil, while healing is beneficial. |
||
| + | **Moira's right hand is ghoulish and damaged, and her right eye is red, referencing evil creatures depicted with red eyes. |
||
* Moira is the second hero after [[D.Va]] who can perform the "Quick Melee" attack with both her hands, chosen randomly. |
* Moira is the second hero after [[D.Va]] who can perform the "Quick Melee" attack with both her hands, chosen randomly. |
||
| − | * Moira has |
+ | * Moira has two different eye colors, the right one being red and the left blue. She may be heterochromatic (born with two different eye colors), or she could have suffered from one of her experiments on herself. |
| − | * Moira's Blackwatch uniform and skin are based on her earliest concept art, which in |
+ | * Moira's Blackwatch uniform and skin are based on her earliest concept art, which in turn resembles the clothing worn by [[Mercy]]. |
| − | * Moira has some backstory with Mercy, as one utilized |
+ | * Moira has some backstory with Mercy, as one utilized technology developed by the other.<ref>2017-11-12, [http://overwatch.blizzplanet.com/blog/comments/blizzcon-2017-overwatch-whats-next-panel-transcript/5 BlizzCon 2017 Overwatch: What’s Next Panel Transcript]. ''Blizzplanet'', accessed on 2017-11-19</ref> |
| + | **Moira and Mercy have complementary sprays, both called "Sigil". When placed together, they form the complete ''Overwatch'' sigil and position Moira and Mercy back to back. This shows that they are at odds. |
||
| − | * In the 2018 ''[[Summer Games]]'' event she got a skin called, Éireannach, which means "Irish Woman" or "an Irish person." |
||
| + | * In the 2018 ''[[Summer Games]]'' event, Moira received a skin called "Éireannach", which means "Irish Woman" or "an Irish person." |
||
| − | * The Éireannach skin replaces Moira's left blue eye with a green eye probably for color scheme reasons. |
||
| − | * |
+ | **The Irish flag appears over her right breast on this skin. |
| + | **The Éireannach skin replaces Moira's left blue eye with a green eye probably for color scheme reasons. |
||
| − | * Oasis University had a special interaction between ''[[Reaper]]'' and ''[[Sombra]]'' when on the same team that teased Moira's release. Sombra asked him "What are we doing here boss?" and Reaper responded to her with "I am here to visit an old friend." |
||
| + | * Oasis University had a special interaction between [[Reaper]] and ''[[Sombra]]'' when on the same team that teased Moira's release. Sombra asked him "What are we doing here boss?" and Reaper responded to her with "I am here to visit an old friend." |
||
* The Blackwatch outfit/skin for Moira was first shown in the ''[[Retribution]]'' comic. |
* The Blackwatch outfit/skin for Moira was first shown in the ''[[Retribution]]'' comic. |
||
| − | * It is confirmed by Michael Chu that Moira's |
+ | * It is confirmed by Michael Chu that Moira's third-person "Naruto run" and Ultimate Ability are anime references, as well as some of her sprays. "Naruto running" is also an Internet meme. |
| + | **Moira's Ultimate Ability is probably a reference to ''Dragon Ball Z''. |
||
| + | *Moira's "Facepalm" spray could be a reference to Captain Jean-Luc Picard from ''Star Trek: The Next Generation''. A still of him "facepalming" is a rather common Internet meme used to respond to stupidity. |
||
* It is revealed in the [[Retribution]] event that Moira likes to dress up and enjoys art. |
* It is revealed in the [[Retribution]] event that Moira likes to dress up and enjoys art. |
||
| − | * Moira is from Ireland's capital, Dublin, |
+ | * Moira is from Ireland's capital, Dublin, as is her voice actress, Genevieve O'Reilly. |
| − | * Moira's |
+ | * Moira's favorite drink is Irish coffee<ref>2018-12-12, [https://twitter.com/westofhouse/status/1072885891490754566 Michael Chu's Twitter]. ''Twitter'', accessed on 2018-12-12</ref><ref>Monroe-Cassel, Chelsea. ''Overwatch: The Official Cookbook''. Insight Editions, 2019.</ref>. She is holding a steaming mug of it in her "Toast" victory pose. |
| + | *Moira's shortened nails on her left hand could also hint that Moira is left-handed. |
||
===Development=== |
===Development=== |
||
| Line 465: | Line 373: | ||
[[File:Moira Oasis.jpg|thumb|Moira Oasis skin concept art]] |
[[File:Moira Oasis.jpg|thumb|Moira Oasis skin concept art]] |
||
[[File:Moira Glam.png|thumb|Moira Glam skin concept art]] |
[[File:Moira Glam.png|thumb|Moira Glam skin concept art]] |
||
| + | [[File:Moira Ice Empress.jpeg|thumb|Moira Ice Empress skin concept art]] |
||
Moira's initial gameplay design involved her having a large health pool, which she would spend as a resource to heal allies while draining health from enemies, but it proved to be too difficult to balance. Early inspiration for her abilities may have been drawn from [[Overmind]], a hero created for the original ''[[Overwatch#Development|Prometheus]]'' pitch. In her final design, she instead uses separate Regeneration and Decay versions of her abilities, with her Biotic Grasp: Decay ability leeching health from enemies and enhancing the effectiveness of her Regeneration abilities. Because she is one of the few characters in the game to have both hands visible on the screen at all times, great care was taken with her animations to convey how these different abilities worked and reflected her design and personality. Her [[Fade]] ability was also designed to be similar to Reaper's [[Wraith Form]], showing that the two characters are connected. The original version of her ultimate ability was a transformation that involved biotic energy swirling around her and gave her a beam that could both heal and damage, but as the beam was the most interesting aspect of the ability they decided to make it her ultimate's sole focus.<ref name="Blizzcon 2017"/> |
Moira's initial gameplay design involved her having a large health pool, which she would spend as a resource to heal allies while draining health from enemies, but it proved to be too difficult to balance. Early inspiration for her abilities may have been drawn from [[Overmind]], a hero created for the original ''[[Overwatch#Development|Prometheus]]'' pitch. In her final design, she instead uses separate Regeneration and Decay versions of her abilities, with her Biotic Grasp: Decay ability leeching health from enemies and enhancing the effectiveness of her Regeneration abilities. Because she is one of the few characters in the game to have both hands visible on the screen at all times, great care was taken with her animations to convey how these different abilities worked and reflected her design and personality. Her [[Fade]] ability was also designed to be similar to Reaper's [[Wraith Form]], showing that the two characters are connected. The original version of her ultimate ability was a transformation that involved biotic energy swirling around her and gave her a beam that could both heal and damage, but as the beam was the most interesting aspect of the ability they decided to make it her ultimate's sole focus.<ref name="Blizzcon 2017"/> |
||
| Line 498: | Line 407: | ||
{{#ev:youtube|4vL5UUaI85E|450|inline}} |
{{#ev:youtube|4vL5UUaI85E|450|inline}} |
||
| − | == |
+ | ==Balance Change Logs== |
| + | {{PatchTableStart}} |
||
| − | ''For more information, see [[Patch Notes]]'' |
||
| + | {{PatchTableElement|2020-11-19|{{Al|Biotic Grasp}} |
||
| + | *Healing resource consumption rate lowered from 14 to 12.5 |
||
| + | }}{{PatchTableElement|2020-08-31|{{Al|Biotic Grasp}} |
||
| + | |||
| + | Healing |
||
| + | *Lingering heal reduced from 4 seconds to 2 seconds (Total healing from 65 down to 35) |
||
| + | *Healing per second increased from 65 to 70 |
||
| + | *Healing resource consumption rate increased from 11 to 14 (27%) |
||
| + | |||
| + | Damage |
||
| + | *Attach angle reduced by 37% |
||
| + | *Healing resource gain rate increased by 50% |
||
| + | }}{{PatchTableElement|2020-05-19|{{Al|Biotic Orb}} |
||
| + | *Damage radius reduced from 5 to 4 meters |
||
| + | *Projectile speed increased from 16 to 20 |
||
| + | *Projectile duration reduced from 10 to 7 seconds |
||
| + | }} |
||
| + | {{PatchTableElement|2019-12-10|{{Al|Biotic Grasp}} |
||
| + | *Healing reduced from 4 to 3.25 (80 HP/s to 65 HP/s) |
||
| + | }} |
||
| + | {{PatchTableElement|2019-10-15|{{Al|Biotic Grasp}} |
||
| + | *Self-healing reduced from 30 to 20 health per second |
||
| + | }} |
||
| + | {{PatchTableElement|2019-03-19|{{Al|Biotic Grasp}} |
||
| + | *Heal over time duration increased from 3 to 4 seconds |
||
| + | *Total healing increased from 50 to 65 |
||
| + | }} |
||
| + | {{PatchTableElement|2018-08-09|{{Al|Biotic Grasp}} |
||
| + | *Passive energy regeneration rate increased from 2 per second to 2.4 per second |
||
| + | }} |
||
| + | {{PatchTableElement|2018-04-10|{{Al|Biotic Grasp}} |
||
| + | *Transparency increased the closer you are to a target |
||
| + | {{Al|Coalescence}} |
||
| + | *Now becomes more transparent the closer its visual effects are to a player’s camera |
||
| + | {{Al|Fade}} |
||
| + | *Transparency increased the closer you are to a target |
||
| + | }} |
||
| + | {{PatchTableElement|2017-11-16|New Hero: Moira (Support) |
||
| + | }} |
||
| + | {{PatchTableEnd}} |
||
==References== |
==References== |
||
| Line 508: | Line 457: | ||
{{Heroes}} |
{{Heroes}} |
||
| − | [[Category:Moira]] |
+ | [[Category:Moira| ]] |
[[Category:Heroes]] |
[[Category:Heroes]] |
||
| − | [[Category: |
+ | [[Category:Talon members]] |
Revision as of 20:40, 6 January 2021
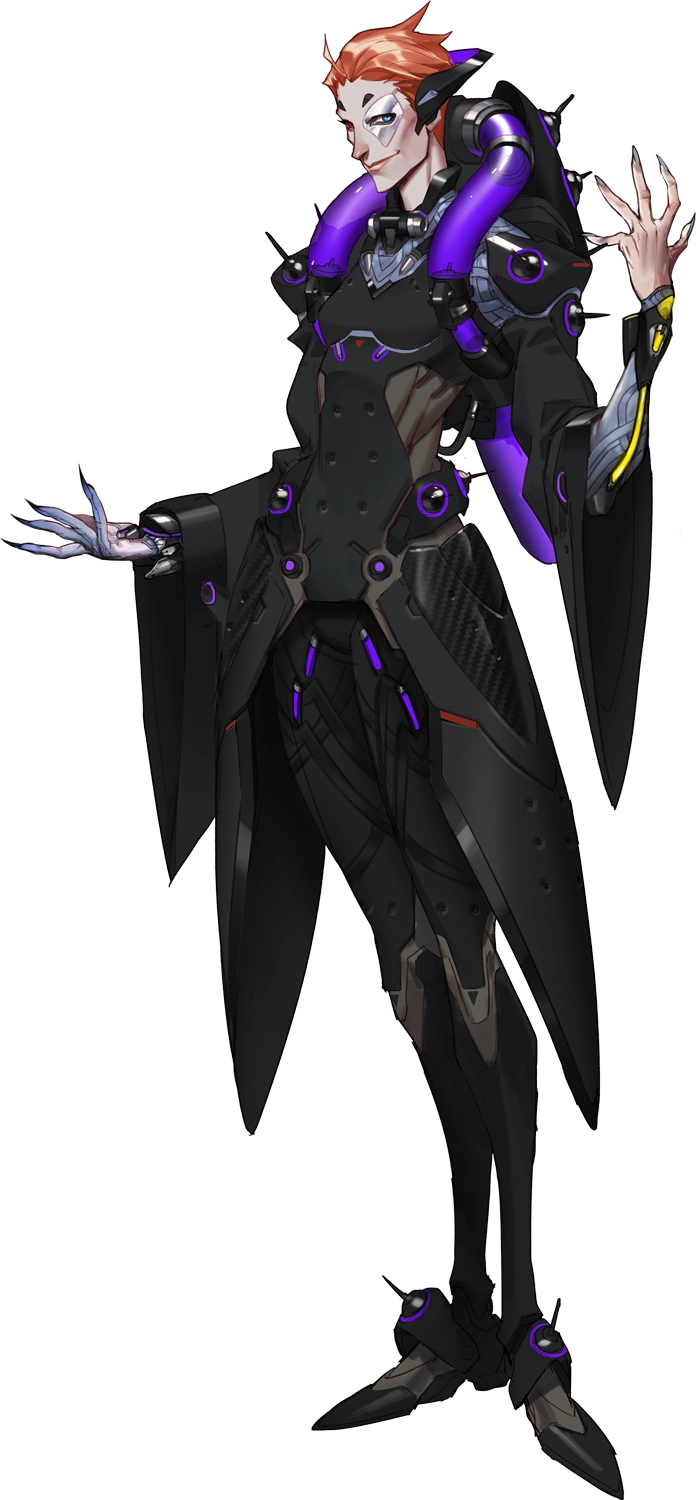
| Moira | |
|---|---|
|
| |
| "Science will reveal the truth." | |
Real Name |
Moira O'Deorain |
Status |
Active |
Age |
48 |
Nationality |
|
Occupation |
Geneticist Minister of Genetics |
Base |
Dublin, Ireland Oasis, Iraq |
Affiliation |
Blackwatch (formerly) Talon (council member) |
| Genevieve O'Reilly [1] (English)
Déborah Perret (French) | |
Cosmetics |
Cosmetic page |
Quotes |
Quotation page |
Role |
Support |
Health |
200 |
Character Video
| |
Moira is a Support hero in Overwatch.
Overview
Moira’s biotic abilities enable her to contribute healing or damage in any crisis. While Biotic Grasp gives Moira short-range options, her Biotic Orbs contribute longer-range, hands-off damage and healing; she can also Fade to escape groups or remain close to allies in need of support. Once she’s charged Coalescence, Moira can save multiple allies from elimination at once or finish off weakened enemies.
Abilities

- Passes through allies and enemies, but not enemy barriers.
- Like
 Projectile, there is travel time for the spray to reach its destination.
 - Collision against map geometry and enemy barriers is pinpoint, much like Reinhardts
 Fire Strike.
 - Causes a heal over time that begins upon the last application of the spray healing. This allows Moira to heal without expending resources.
- Regenerates 3.84 biotic energy per second while inactive.
- Needs at least 8 biotic energy to activate.

- Like
 Targeted line of sight to an enemies center of mass is required to initiate and maintain the attack.
 - Like
 Beam Biotic Grasp is unaffected by Deflect, Defense Matrix, and Kinetic Grasp.
 - Self-healing and damage are completely separate. Altering the damage does not affect the self heal.
- Generates 21.875 biotic energy per second. When combined with the passive regeneration, this becomes 25.715 biotic energy per second (or 16% per second).

5 meters (healing orb)
5.5 meters per second while tethered

- Makes Moira invulnerable and invisible. She can still pick up Health Packs.
- Cleanses Moira of status and damage over time effects.
- Can be used to escape abilities such as Graviton Surge or Gravitic Flux.

50 per second (self)
Strategy
Moira is a support hero that can easily reposition amongst her allies with her immense mobility. ![]() Biotic Grasp can heal multiple allies simultaneously, granting her higher average healing per second when compared to other supports. However, this powerful healing is limited by a resource meter similar to D.Va's Defense Matrix; this meter refills very slowly over time, but Biotic Grasp's alternate fire refills it much faster, along with healing Moira herself.
Biotic Grasp can heal multiple allies simultaneously, granting her higher average healing per second when compared to other supports. However, this powerful healing is limited by a resource meter similar to D.Va's Defense Matrix; this meter refills very slowly over time, but Biotic Grasp's alternate fire refills it much faster, along with healing Moira herself. ![]() Fade provides her a very strong movement tool and invulnerability that makes her very hard to lock down.
Fade provides her a very strong movement tool and invulnerability that makes her very hard to lock down. ![]() Biotic Orb can allow Moira to apply both damage and healing at the same time, and is very powerful in enclosed spaces where it will not simply fly past its targets.
Biotic Orb can allow Moira to apply both damage and healing at the same time, and is very powerful in enclosed spaces where it will not simply fly past its targets. ![]() Coalescence can both heal allies and damage enemies, but perhaps most importantly it can pierce barriers, preventing enemy tanks from blocking your ultimate with various shields. Her alternate fire gives her amazing sustain, particularly in 1v1 fights, and her
Coalescence can both heal allies and damage enemies, but perhaps most importantly it can pierce barriers, preventing enemy tanks from blocking your ultimate with various shields. Her alternate fire gives her amazing sustain, particularly in 1v1 fights, and her ![]() Fade gives her excellent escapes, greatly aiding her survivability against enemy flankers, though she remains weak to large burst damage such as enemy Snipers or Junkrat. Her kit, though very strong, lacks the utility other healers provide, making her focused though not particularly versatile.
Fade gives her excellent escapes, greatly aiding her survivability against enemy flankers, though she remains weak to large burst damage such as enemy Snipers or Junkrat. Her kit, though very strong, lacks the utility other healers provide, making her focused though not particularly versatile.
General Strategies
- Priorities:
- 0. Think - the list below is not set in stone. During a course of teamfight you must make your own decisions based on the circumstances you are facing.
- 1. Your own safety – while keeping your team alive is a reason you play healer, if you die your allies will soon follow, as they will not have a way to sustain themselves in a teamfight. Use Fade to avoid attackers and dodge lethal damage and keep your health high with the combination of basic abilities.
- 2. Healing ally in immediate risk of dying - when one of your teammates is receiving damage very quickly or is on low health, you should prioritize healing them to prevent their death. Biotic Grasp is one of the strongest healing effects in the game, and will be able to outheal many sources of damage. Be careful with using Biotic Orb in these situations though – time that is needed to cast it and resume healing with Primary Fire may cost your ally life.
- 3. Healing a group of allies - when multiple allies take spread damage while standing close to each other, Moira is the best healer to deal with it. The combination of Biotic Grasp and Orb healing effects will allow you to reach a short burst of a stunning 140 health per second healing. This will outpace nearly all non-Ultimate damage that enemies may throw at you. Healing in this scenario charges Moira’s ultimate at break-neck pace.
- 4. Damaging low health targets - Moira’s lock-on Secondary Fire and damaging Biotic Orb will allow her to fairly effectively secure eliminations on low health enemies. If the target is receiving any healing though, Moira’s damage alone is likely not going to be enough to burn through their healthpool.
- 5. Damage enemies that are not behind barriers - it will allow you to recharge your healing resource quicker, heal yourself and help your damage dealers in burning targets down. This also builds up your ultimate charge. When you are certain that the enemy will not engage in the next 10 seconds, you may also use your Biotic Orb to harass targets behind barriers.
- 6. Damage barriers - to put it simply: it’s not your job and you are terrible at it. If there is precisely nothing else for you to do, you may attack barriers with your Secondary Fire, but it will neither heal you nor restore your healing resource.
Match-Ups and Team Synergy
Tank
| Hero | Match-Up | Team Synergy |
|---|---|---|
D.Va |
D.Va is able to make Moira less effective with her Defense Matrix which will destroy her Biotic Orbs. With her high armour HP, it is not advised to attack D.Va with Biotic Grasp, instead leave D.Va for your team to deal with. If a teammate is under attack by D.Va, you can mostly negate her damage with Biotic Grasp, however she can outdamage the healing if she is close enough & accurate, so a Biotic Orb will be needed to keep your teammate alive if she is too close. | (To be added) |
Orisa |
(To be added) | (To be added) |
Reinhardt |
Moira can't reliably apply pressure to Reinhardt with her low damage, and Reinhardt's armour will decrease her damage. Instead focus on baiting out his shatter by standing in front of him, then using Fade when you hear him using Earthshatter. | (To be added) |
Roadhog |
You should never try to take on a Roadhog as Moira, as he can easily outheal your damage & hook combo you. Try to bait his Hook with Fade so it is easier for your team to deal with him. Always stay far away from Roadhog & with your team so you don't get Hooked. | (To be added) |
Sigma |
(To be added) | (To be added) |
Wrecking Ball |
Going after Wrecking Ball with Moira is pointless, you will just be wasting your time. Only go for him if he is low, and make sure you watch your other support & immediately heal them if Wrecking Ball pile drives them. | (To be added) |
Winston |
Winston makes it much harder for Moira to heal with his bubble. Winston only just outdamages Moira's healing, so if a teammate is under attack by Winston, you can potentially save them if you keep heals on them. | (To be added) |
Zarya |
Zarya can be easily taken out with Moira if she is not charged, otherwise you should not engage as she can outdamage your self-heal easily. | (To be added) |
Damage
| Hero | Match-Up | Team Synergy |
|---|---|---|
Ashe |
Use Fade to negate Dynamite's damage, or to move closer to Ashe when she uses her Coach Gun. You can then finish her off with Biotic Grasp & Bitotic Orb combo. | (To be added) |
Bastion |
When in turret form, Moira's damage is next to useless against Bastion. Try to focus on healing whoever is attacking the enemy bastion - you can throw a damage orb if your team is diving the Bastion to cancel out his self-healing. | (To be added) |
Doomfist |
Doomfist can be easily evaded with Fade, however his shields can make finishing him off an issue. Try to use Fade to dodge his seismic slam combo instead of Rocket Punch, as Rocket Punch can be baited by walking in one direction then moving in another. You can manipulate Doomfist's Uppercut into positioning yourself on the high ground, simply use Fade while in the air to move out of his danger zone. | (To be added) |
Genji |
Genji is no problem for Moira to kill, make sure you dodge his Dash with Fade, then throw a Damage Orb to his location & focus Biotic Grasp on him. If he uses dragonblade, use Coalescence on whoever he is targeting to negate his damage & save that teammate. This won't work if he is nanoboosted, unless you have an Ana which will increase the healing with Biotic Grenade. | (To be added) |
Hanzo |
Hanzo can be a huge problem for Moira, though if you catch him off guard & without Lunge, you can combo Biotic Grasp + Biotic Orb to quickly take him down, though you should strafe & crouch randomly so he doesn't headshot you. | (To be added) |
Junkrat |
Junkrat is dangerous at close range as you cannot heal yourself quickly enough if taking hits from his bombs. Keep a medium range distance while draining him with Biotic Grasp; he can easily dodge your Damage Orb with his Concussion Mines, so don't waste your Orb. | (To be added) |
McCree |
McCree can be an issue as it is relatively easy for him to hit you. You can move forward toward McCree while strafing & bait out his Flashbang with Fade, which makes him much easier for your team to finish off. | (To be added) |
Mei |
Keep your distance & don't let her get more than 1 icicle on you. If you're hit, Fade away to cover & wait for your cooldowns to reset. You can save a teammate with Biotic Grasp + Biotic Orb if they are frozen, but you have to be quick. Don't let her get close if you don't have Fade, as you will not be able to deal enough damage to kill her, nor will your self-healing be able to save you. | (To be added) |
Pharah |
Since Moira's Biotic Grasp has medium range, you can attack Pharah while she's in the air, though you should focus more on healing a hitscan who can reliably damage the Pharah. Try to lure her into an area where your Damage Orb can hit her, otherwise stay away as she can easily burst you down. | (To be added) |
Reaper |
You will do very little to Reaper if he is close to you, as he will outheal most of your damage. Do not waste Fade as Reaper can then Wraith Form up to you & finish you off, instead try to move toward your team & allow them to deal with Reaper. If in a 1v1 situation, you will want to stay as far away as possible, while slowly draining his health. | (To be added) |
Soldier: 76 |
You will deal very little damage to Soldier: 76 if he is using his Biotic Field - try to wait it out, or bounce a Damage Orb around him. It is a much better strategy to heal yourself with a Healing Orb as he can easily kill you with his Helix Rockets if you're even somewhat damaged. | (To be added) |
Sombra |
As Sombra's damage is relatively low, you can easily outdamage her & still have plenty of health left from self-healing. Moira can be good at countering Sombra since you can spin around & quickly cancel her hack. | (To be added) |
Symmetra |
You can quickly destroy Symmetra's turrets, clearing the area for your team & minimising damage. The range of Biotic Grasp is about double of her laser, meaning keeping yourself at the maximum range of the grasp is a good idea. Additionally, you can use Fade to safely pass her turrets; if she is uncharged then it is quite easy to kill her since your lifesteal will heal most of the damage. | (To be added) |
Torbjörn |
The turret will be a problem for Moira as you cannot steal health when attacking it, along with Torb's armour which decreases your damage, he isn't a viable target for Moira. You can use a healing orb while attacking the turret at the cost of giving him ultimate charge. Try to leave this to another teammate. | (To be added) |
Tracer |
Make sure to keep Fade ready when she has Pulse Bomb, and if she gets too close & deals too much damage, Fade away & cast a Healing Orb, along with keeping Biotic Grasp on her for 70 Healing p/s on yourself. This makes winning the 1v1 with Tracer much easier, as she will have to disengage to get health kits. If you know she has no more blinks left, you can chase her down with Fade & easily finish her off, but be careful not to get baited into a Pulse Bomb! | (To be added) |
Widowmaker |
You shouldn't try to take on a Widowmaker, leave it to your team. However if you're feeling ballsy, you can Fade & dive Widow, cast a Damage Orb, and use Biotic Grasp to easily bring her HP to 0. If she is being pocketed or a healer is near her, you shouldn't try this as it is suicide. | (To be added) |
Support
| Hero | Match-Up | Team Synergy
|
|---|---|---|
Ana |
If you're going to attack Ana with Moira, you can bait out her Biotic Grenade as it is fairly obvious when Ana is going to use it (looking at the ground & moving toward you).
It is then very easy to finish her off unless she gets some well placed shots. Try to save Fade for dodging Sleep Dart or Biotic Grenade, though if only dodging one, make sure you move further away so it is easier to dodge Ana's other projectile ability. |
Ana's Biotic Grenade combined with Moira's Coalescence equals a lot of healing, and can even negate a NanoBoosted Genji's Dragonblade. |
Baptiste |
When battling Baptiste, you need to wait out his Immortality Field as you will not be able to destroy it in time with Biotic Grasp. Once his Immortality Field is down, he is a free kill for Moira. | (To be added) |
Brigitte |
Never let Brigitte get close to you, always keep your distance & focus on healing instead of going after her, as you can easily outheal her damage. If she can't get close to you, it's a free kill. | (To be added) |
Lúcio |
You can easily burn down Lucio with Biotic Grasp, though you shouldn't throw a Damage Orb at him as he can quickly speed away. Make sure to not use Coalescence if you know he has his ultimate, as it will nullify your damage. Once he has used his ultimate, wait a few seconds before casting a Damage Orb & Coalescence to burn down any enemies near you, and to keep your team alive if needed. | (To be added) |
Mercy |
If the situation allows it, make Mercy your primary target with your Biotic Orb, Biotic Grasp, or Coalescence, as she is easy to burn down with these abilities, unless she is flying around with a Pharah or Echo. Moira is a very effective hero against Mercy. | (To be added) |
Moira |
Always use Coalescence AFTER the enemy Moira, this will ensure you have more heals and a better chance at winning, though this may not be possible for every situation if a teammate is in trouble (e.g. in a Graviton Surge).
For 1v1, you will want to stay in an area where you can reliably bounce your Orb while moving randomly to reduce damage dealt to you & the enemy Moira's healing. Healing orb is favoured over Damage Orb, but this can make the 1v1 last a long time. Once the enemy Moira casts Coalescence, use your Damage Orb & Coalescence to quickly burn her down. |
(To be added) |
Zenyatta |
Since Zenyatta has no mobility you can easily burn him down with Biotic Grasp & Damage Orb, but be careful as he can easily kill you with a few well placed shots. Save your Fade to remove his Orb of Discord then resume attacking him - he will be forced to reapply the Orb of Discord which will slow him down slightly. | (To be added) |
Story
Equal parts brilliant and controversial, scientist Moira O'Deorain is on the cutting edge of genetic engineering, searching for a way to rewrite the fundamental building blocks of life. Though O'Deorain will go to any lengths to make scientific breakthroughs, her work is still unknown to most of the world. But now that she has been freed from all constraints, it is only a matter of time before everything changes.[2]
O'Deorain has a negative view of Overwatch, claiming that it was responsible for stifling scientific advancement for decades.[3] She has no interest in global conquest,[4] but is willing to work with those who might have such a goal. [5] Her intellectual pursuits are driven by her interest in humanity.[4] She is a geneticist first and foremost, and that's the scope of her ambition. With very flexible morals, O'Deorain prefers to focus on her research and has no patience for those who urge caution or restraint.[5]
Her right hand is heavily scarred; it has been speculated that it is a result of experimentation or a genetic anomaly.[5]
Background
| “ | We are bedevilled by the mysteries of creation. Science can reveal the truths that lie behind these many questions. What we learn can unlock the true potential of humanity. | „ |
| ~ Moira O'Deorain |


O'Deorain conducts her research
Over a decade ago, O'Deorain made waves when she published a controversial paper detailing a methodology for creating custom genetic programs that could alter DNA at a cellular level. It seemed like a promising step toward overcoming diseases and disorders and maximizing human potential. Dissent among her peers soon followed. Many considered her work to be dangerous because of its perceived ethical shortfalls, and O'Deorain was even accused of having the same unchecked desire for scientific advancement that some believed had caused the Omnic Crisis. In addition, other geneticists were unable to reproduce the results of Moira's research, which further called her discoveries into question. Instead of kickstarting her career, her paper seriously damaged her reputation.[2] Overwatch was among those who condemned her research, and in O'Deorain's own words, tried to silence her.[3]


O'Deorain experiments on Reyes
She received a lifeline in an offer from an unlikely source: Overwatch's covert ops division, Blackwatch.[2] She was personally recruited by Blackwatch's commander, Gabriel Reyes, who wanted someone who could help advise him on matters pertaining to genetics.[5] She continued her work in the shadows while developing new weapons and technologies for the organization.[2] Freed from her shackles, her genetic research greatly accelerated.[3] She had interactions with Blackwatch members Jesse McCree and Genji Shimada, all of whom had their likes and dislikes pertaining to each other.[5] Among her experiments was one done Reyes himself.[3] Her experiments on Reyes gave him super-human abilities, causing his cells to regenerate and decay at a hyper-accelerated rate.[6] Her employment was a closely kept secret.[2]
Retribution
| “ | So much for keeping a low profile. | „ |
| ~ Moira |
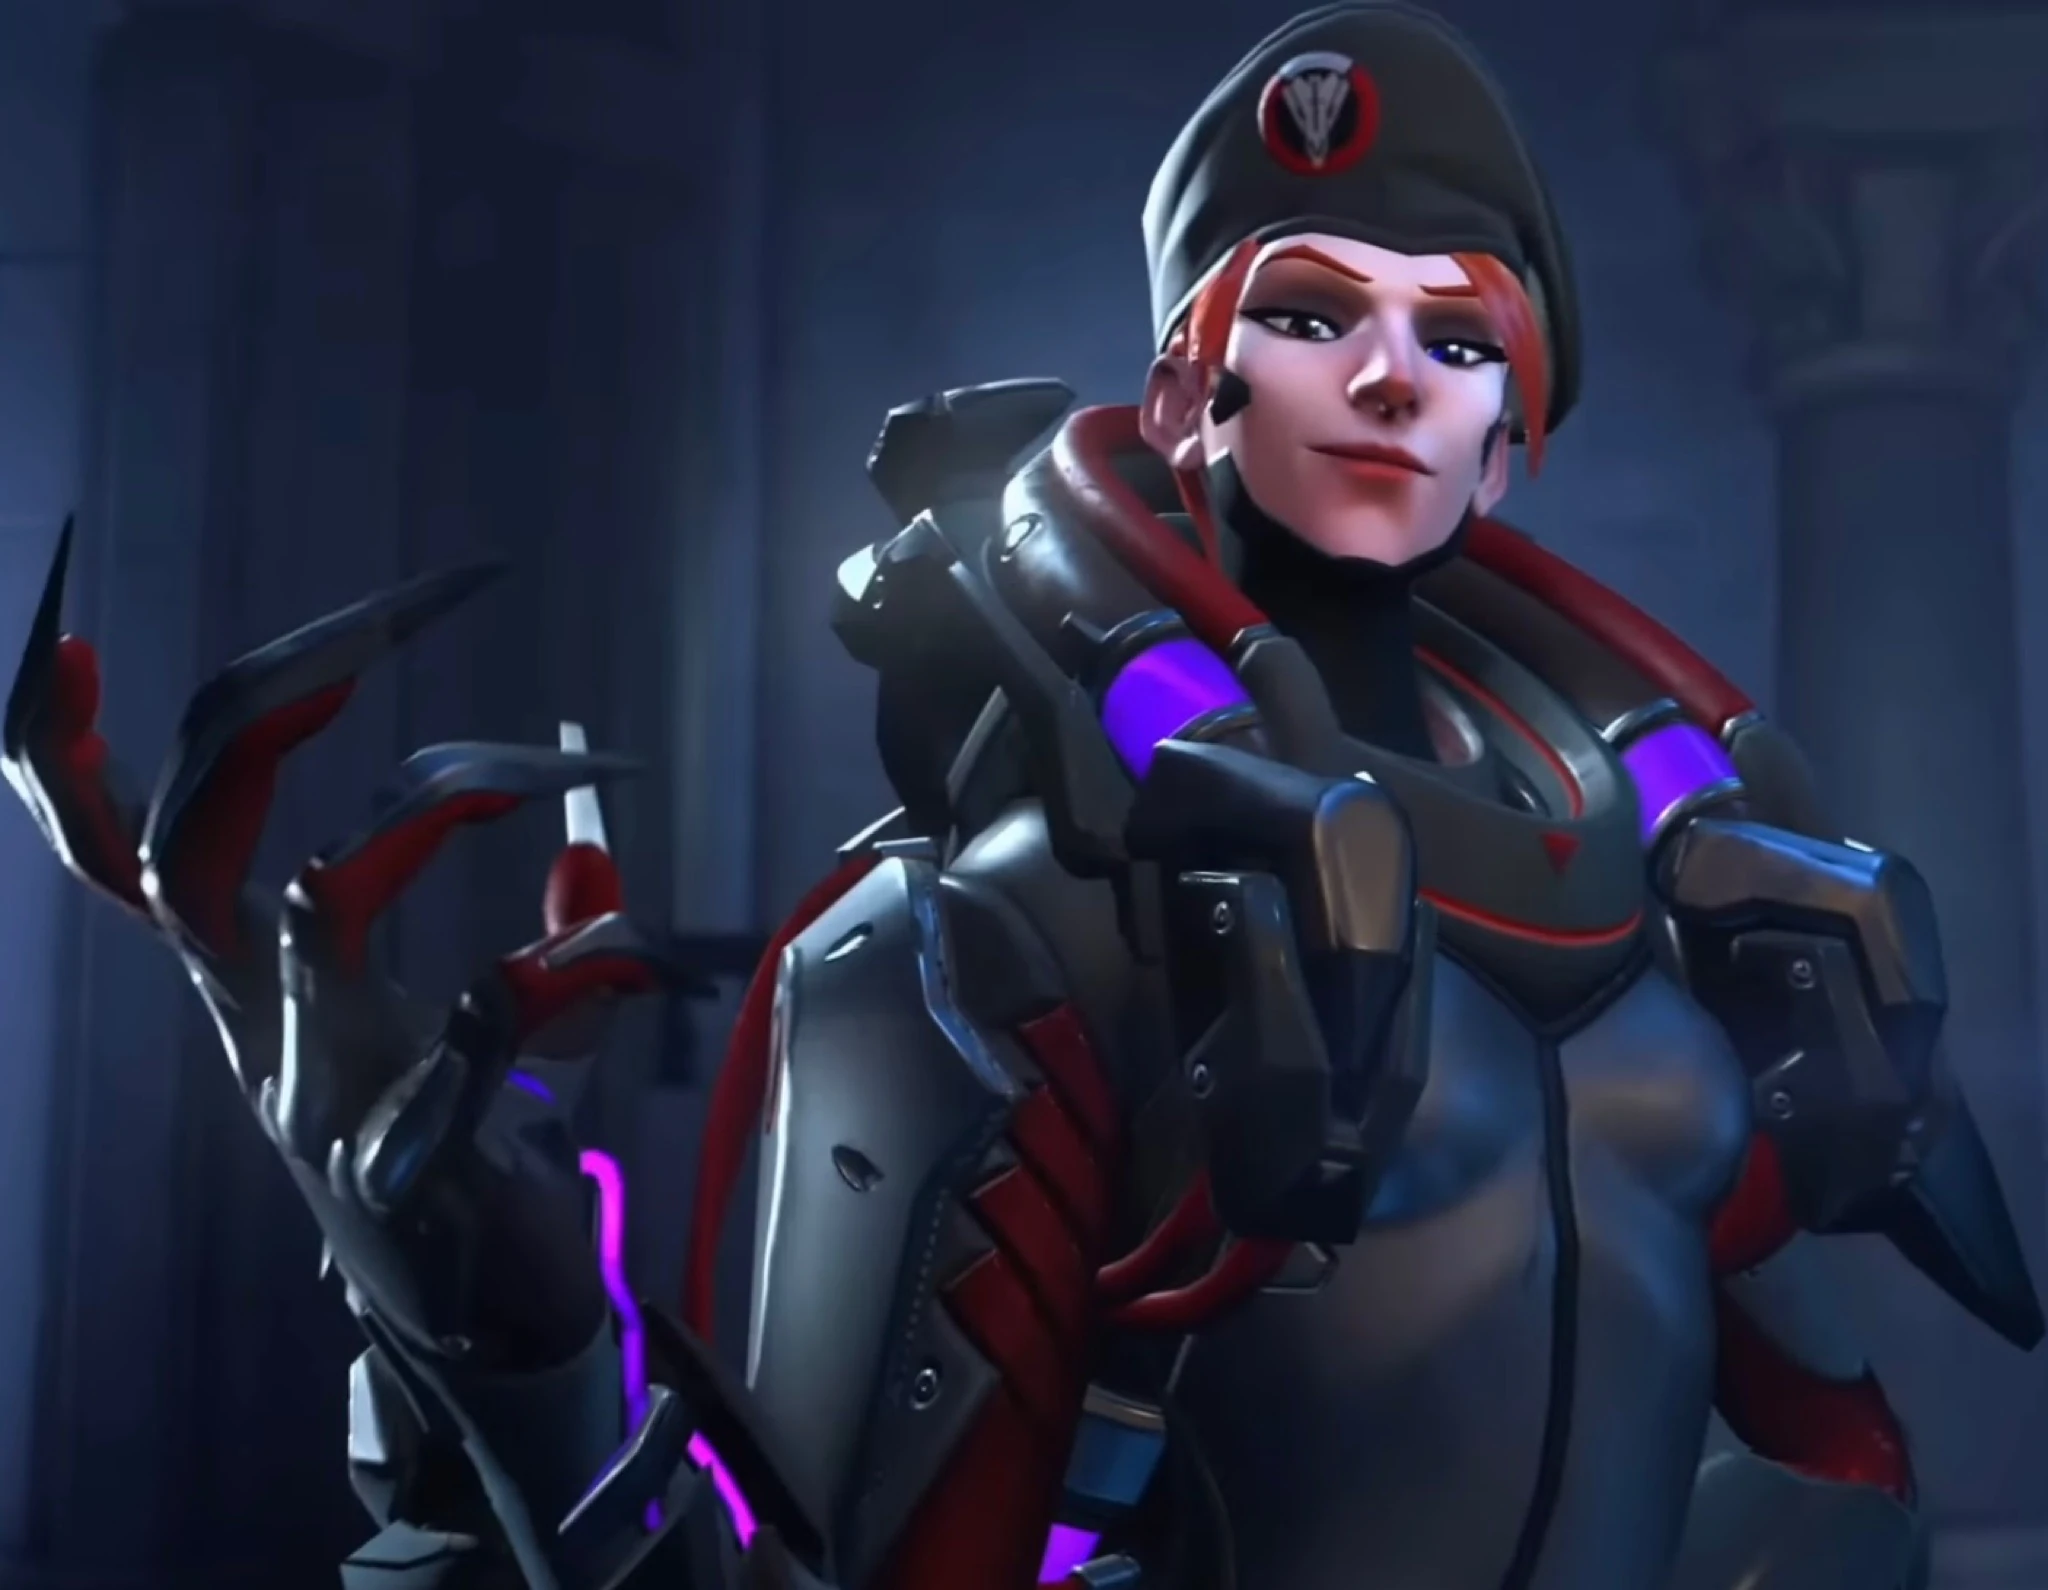
O'Deorain inside Rialto
Eight years before the present day, O'Deorain took part in a Blackwatch mission to Rialto to apprehend Antonio Bartalotti, an Italian businessman with links to Talon. The team consisted of herself, Reyes, Shimada, and McCree. The Blackwatch team arrived in a Venice safehouse and set up survaillance on the manor. They found Talon soldiers patrolling the grounds. When night fell, they infiltrated the manor.[7] They made their way through its interior, killing and/or incapacitating numerous Talon guards. Upon reaching Antonio's office, they found him there, not surprised to see them. Nor was he intimidated, as he pointed out that Overwatch abducting a "respected businessman" would be a public relations nightmare. Furthermore, even if they did take him, his "friends" would have him released within a week. After some thought, Reyes said "you're right" and shot Antonio, the force of the blast sending him through his office window. It was the shot that stirred the hornet's nest, alerting Talon to their presence, leaving them with "Plan B"—fight their way out. In the ensuring battle, O'Deorain told Reyes that he'd done the right thing, and that he shouldn't apologize.
Despite numerous Talon soldiers attacking them, the team successfully exfiltrated the site. However, the events revealed the existence of Blackwatch to the world, resulting in political and public fallout.[8] In the inquiries that followed, O'Deorain's research was uncovered. Many high-ranking Overwatch officials disavowed all knowledge of her affiliation with them.[2]
New Employers
| “ | We stand on the brink of a breakthrough in human evolution. I've dedicated my life to unraveling its secrets. I take risks that others would consider to be unwise for I do not share their caution. Overwatch held back the pace of scientific discovery for decades. They believed my methods were too radical, too controversial. They tried to silence me. But there were others in the shadows, searching for ways to circumvent their rules. Freed from my shackles, the pace of our research hastened. Together we delved deeper into those areas forbidden by law, by morality, and by fear. New patrons emerged who possessed an appetite for my discoveries. And with this knowledge, what new world could we build... | „ |
| ~ Moira O'Deorain |
O'Deorain may have had a direct role in saving Reyes's life after the blast that consumed Overwatch HQ. Whatever the case, her experiments on him kept him alive, albeit in a state of agony.[9]
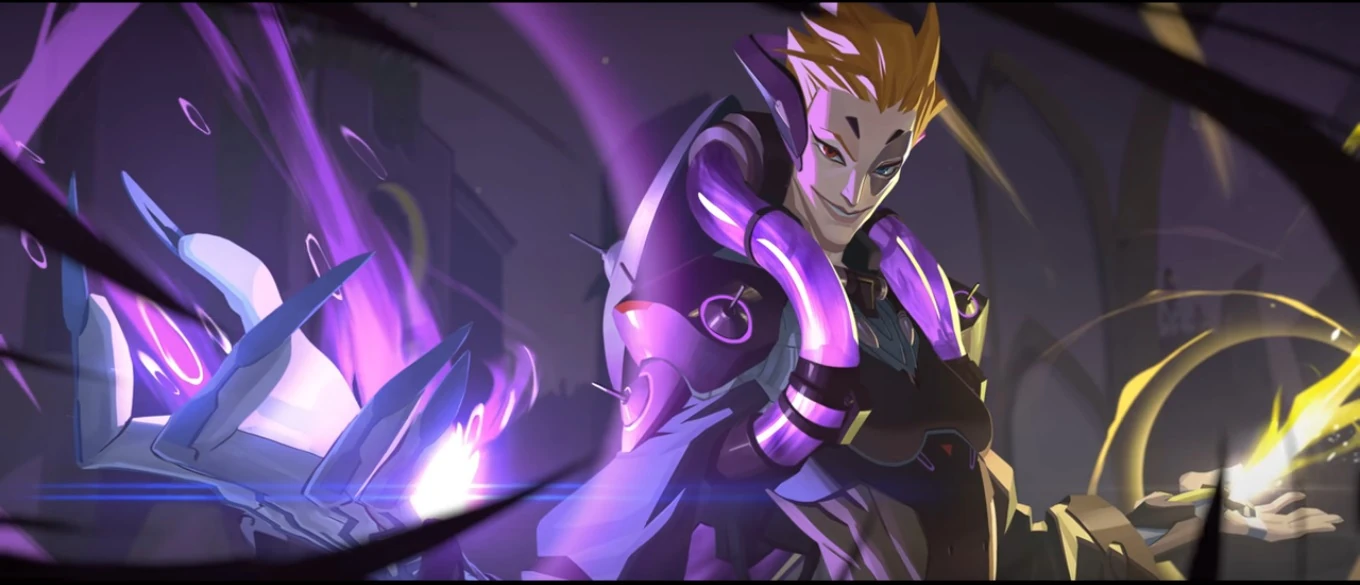

O'Deorain, now a member of Talon
After Overwatch was disbanded, O'Deorain was forced to turn to unconventional sources of funding.[2] This time, she was invited to join the scientific collective that had founded the city of Oasis, and was selected to be their Minister of Genetics.[10] Yet some whispered that the shadowy Talon organization had already been supporting her for years, aiding her experiments in exchange for utilizing the results for their own purposes.[2] By the time of Doomfist's return to Talon (or after his return), Moira apparently had a seat on Talon's inner council.[3] O'Deorain's goals of pushing forward human evolution meshed well with Talon's, and she found a patron for her research in Doomfist.[5]
Achievements
| Name | Icon | Description | Reward |
|---|---|---|---|
|
|
Hit 7 targets simultaneously with Moira's Coalescence in Quick or Competitive play. |  | |
|
|
Fully deplete both types of Moira's Biotic Orb without dying in Quick or Competitive play. |  |
Trivia
- Moira is Hero 26 and the fifth new hero added to the game.
- Moira is an Anglicisation of the Irish name Máire, ultimately derived from the biblical Mary, as well as a Greek name meaning "fate." O'Deorain is an Irish name meaning "descendant of the exile."
- Moira was first shown to players as a member of the Talon Inner Council in the comic Doomfist: Masquerade, but was not given a name or speaking role.
- The day before her reveal, a research paper labeled "Draft: Repairing Degenerative Genetic Structures" was added to the Oasis map, hinting at Moira's occupation and involvement with Reaper.
- There is a story behind Moira's decrepit right hand, hinted to be the result of coming into contact with an anomalous genetic experiment, however, it seems it still doesn't hint at explanation how those genetics are able to allow plasma production in a biotic system.[10]
- Excluding Mercy, who uses both hands to hold her healing staff, Moira is the only Support Hero to heal with her left hand. This references her twisted nature because the left side is traditionally associated with evil, while healing is beneficial.
- Moira's right hand is ghoulish and damaged, and her right eye is red, referencing evil creatures depicted with red eyes.
- Moira is the second hero after D.Va who can perform the "Quick Melee" attack with both her hands, chosen randomly.
- Moira has two different eye colors, the right one being red and the left blue. She may be heterochromatic (born with two different eye colors), or she could have suffered from one of her experiments on herself.
- Moira's Blackwatch uniform and skin are based on her earliest concept art, which in turn resembles the clothing worn by Mercy.
- Moira has some backstory with Mercy, as one utilized technology developed by the other.[11]
- Moira and Mercy have complementary sprays, both called "Sigil". When placed together, they form the complete Overwatch sigil and position Moira and Mercy back to back. This shows that they are at odds.
- In the 2018 Summer Games event, Moira received a skin called "Éireannach", which means "Irish Woman" or "an Irish person."
- The Irish flag appears over her right breast on this skin.
- The Éireannach skin replaces Moira's left blue eye with a green eye probably for color scheme reasons.
- Oasis University had a special interaction between Reaper and Sombra when on the same team that teased Moira's release. Sombra asked him "What are we doing here boss?" and Reaper responded to her with "I am here to visit an old friend."
- The Blackwatch outfit/skin for Moira was first shown in the Retribution comic.
- It is confirmed by Michael Chu that Moira's third-person "Naruto run" and Ultimate Ability are anime references, as well as some of her sprays. "Naruto running" is also an Internet meme.
- Moira's Ultimate Ability is probably a reference to Dragon Ball Z.
- Moira's "Facepalm" spray could be a reference to Captain Jean-Luc Picard from Star Trek: The Next Generation. A still of him "facepalming" is a rather common Internet meme used to respond to stupidity.
- It is revealed in the Retribution event that Moira likes to dress up and enjoys art.
- Moira is from Ireland's capital, Dublin, as is her voice actress, Genevieve O'Reilly.
- Moira's favorite drink is Irish coffee[12][13]. She is holding a steaming mug of it in her "Toast" victory pose.
- Moira's shortened nails on her left hand could also hint that Moira is left-handed.
Development
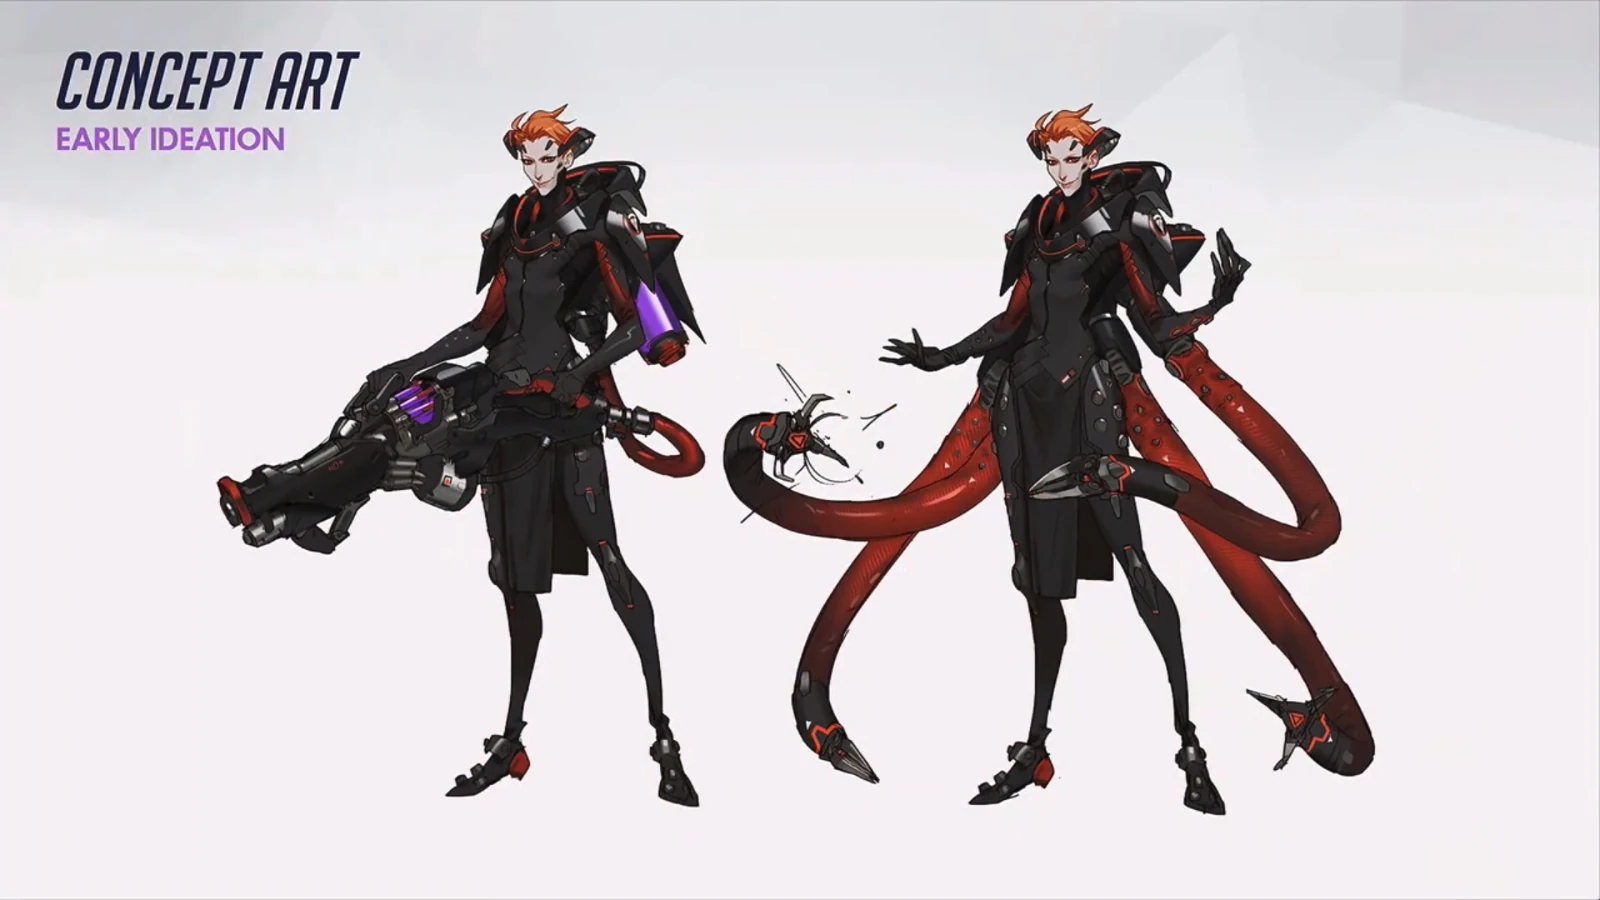
Early concept art of Moira.
Moira's early ideation began with a combination of both gameplay and story ideas, stemming from strong player demand for a new support healer. Their initial goal was to introduce a shady, morally ambiguous healer to contrast with the existing "benevolent healer" archetypes already in the game.[10] The developers wanted her to have connections with various groups in the Overwatch setting.[5] Initial concepts gravitated towards a set of designs with a mysterious androgynous appeal, with the first iteration being outfitted with a set of four mechanical tentacles. Feeling that the tentacles would be difficult to incorporate into gameplay, they progressed to a more conventional, toned-down design with a two-handed spray cannon and began incorporating scientific apparatuses such as tubes and cannisters into her look, but felt that her silhouette became too similar to Zarya's.
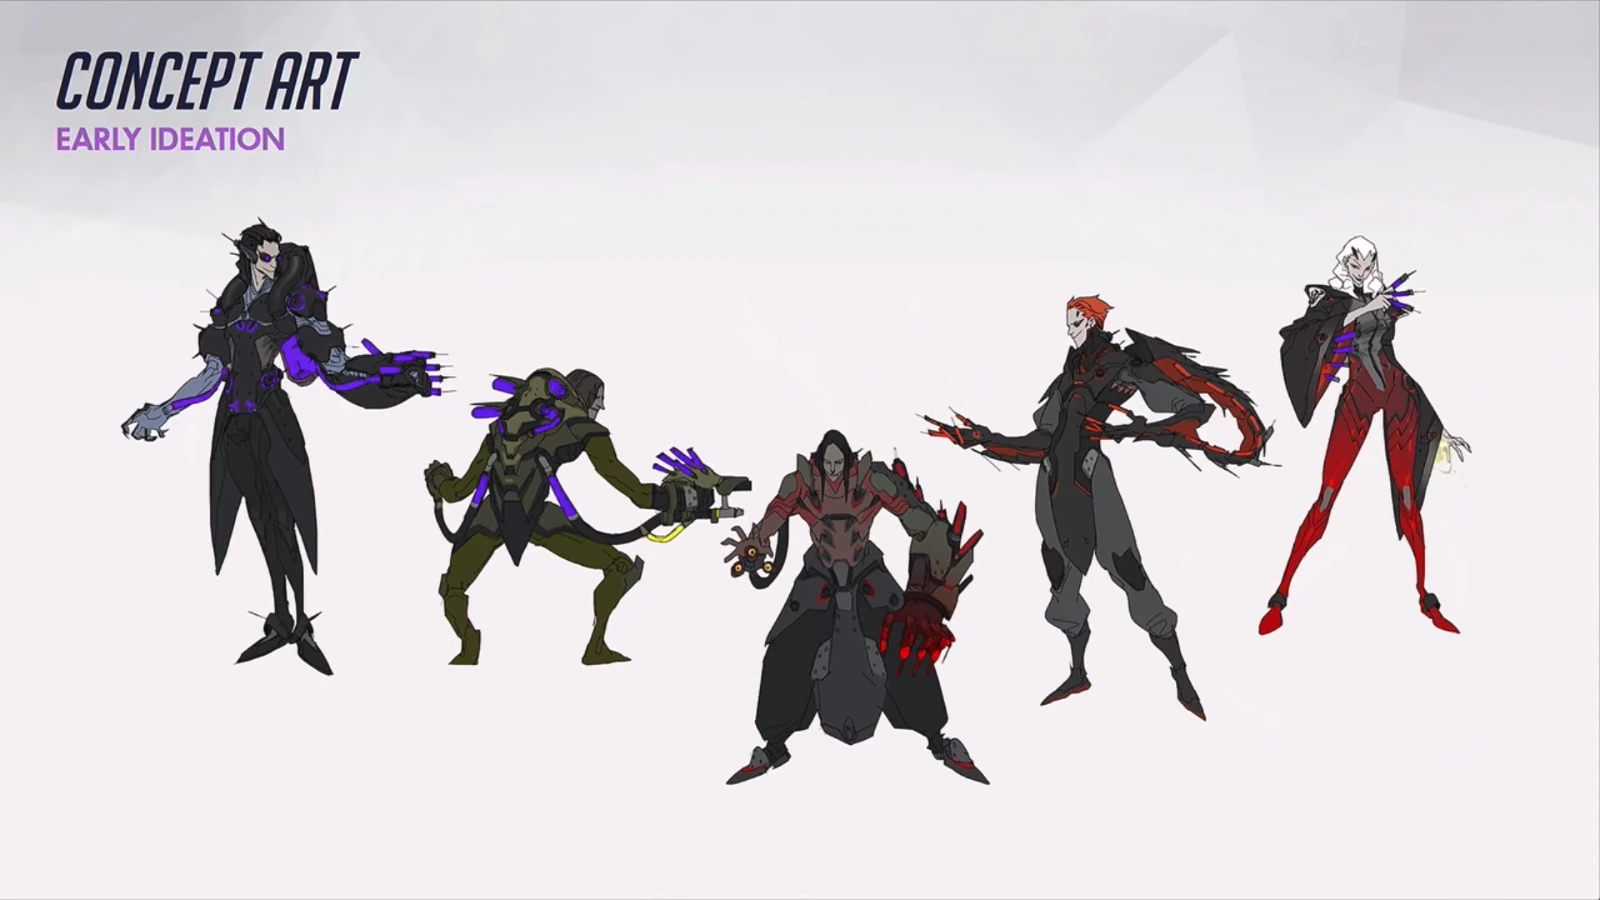

Thumbnails exploring different looks and weapons for Moira, including one inspired by the Omniblade (far right).
At this point they produced a number of thumbnails to experiment with different weapons and costumes while retaining her gaunt, androgynous appearance, with several that wielded various clawed gloves and gauntlets, as well as a concept inspired by Sombra's original Omniblade design, incorporating baggy sleeves and throwable syringes. The latter design also introduced the idea of a duality between her left and right hands, with one used to deal damage and the other to heal. Elements from these thumbnails were pulled together to create her final design, incorporating the earlier scientific details with a color-changing liquid to differentiate her healing and damage dealing abilities.
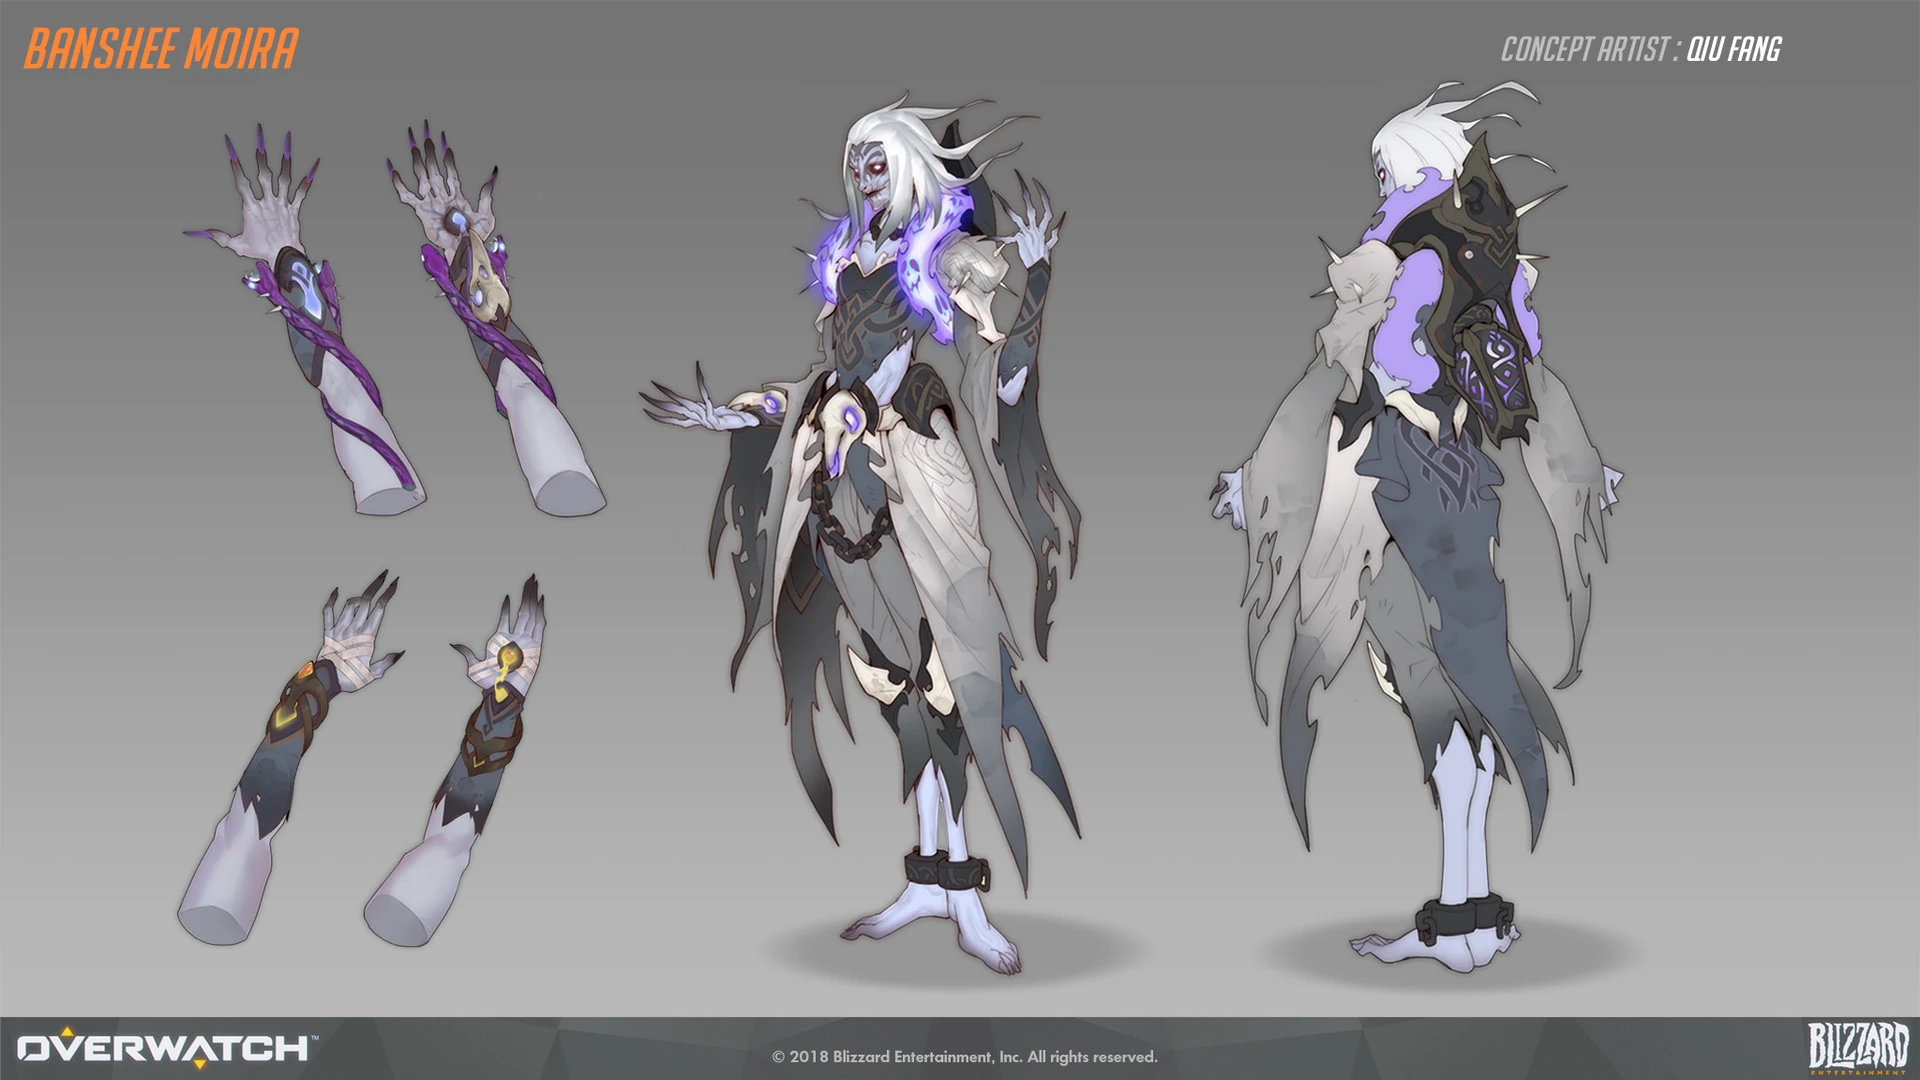

Banshee Moira concept art
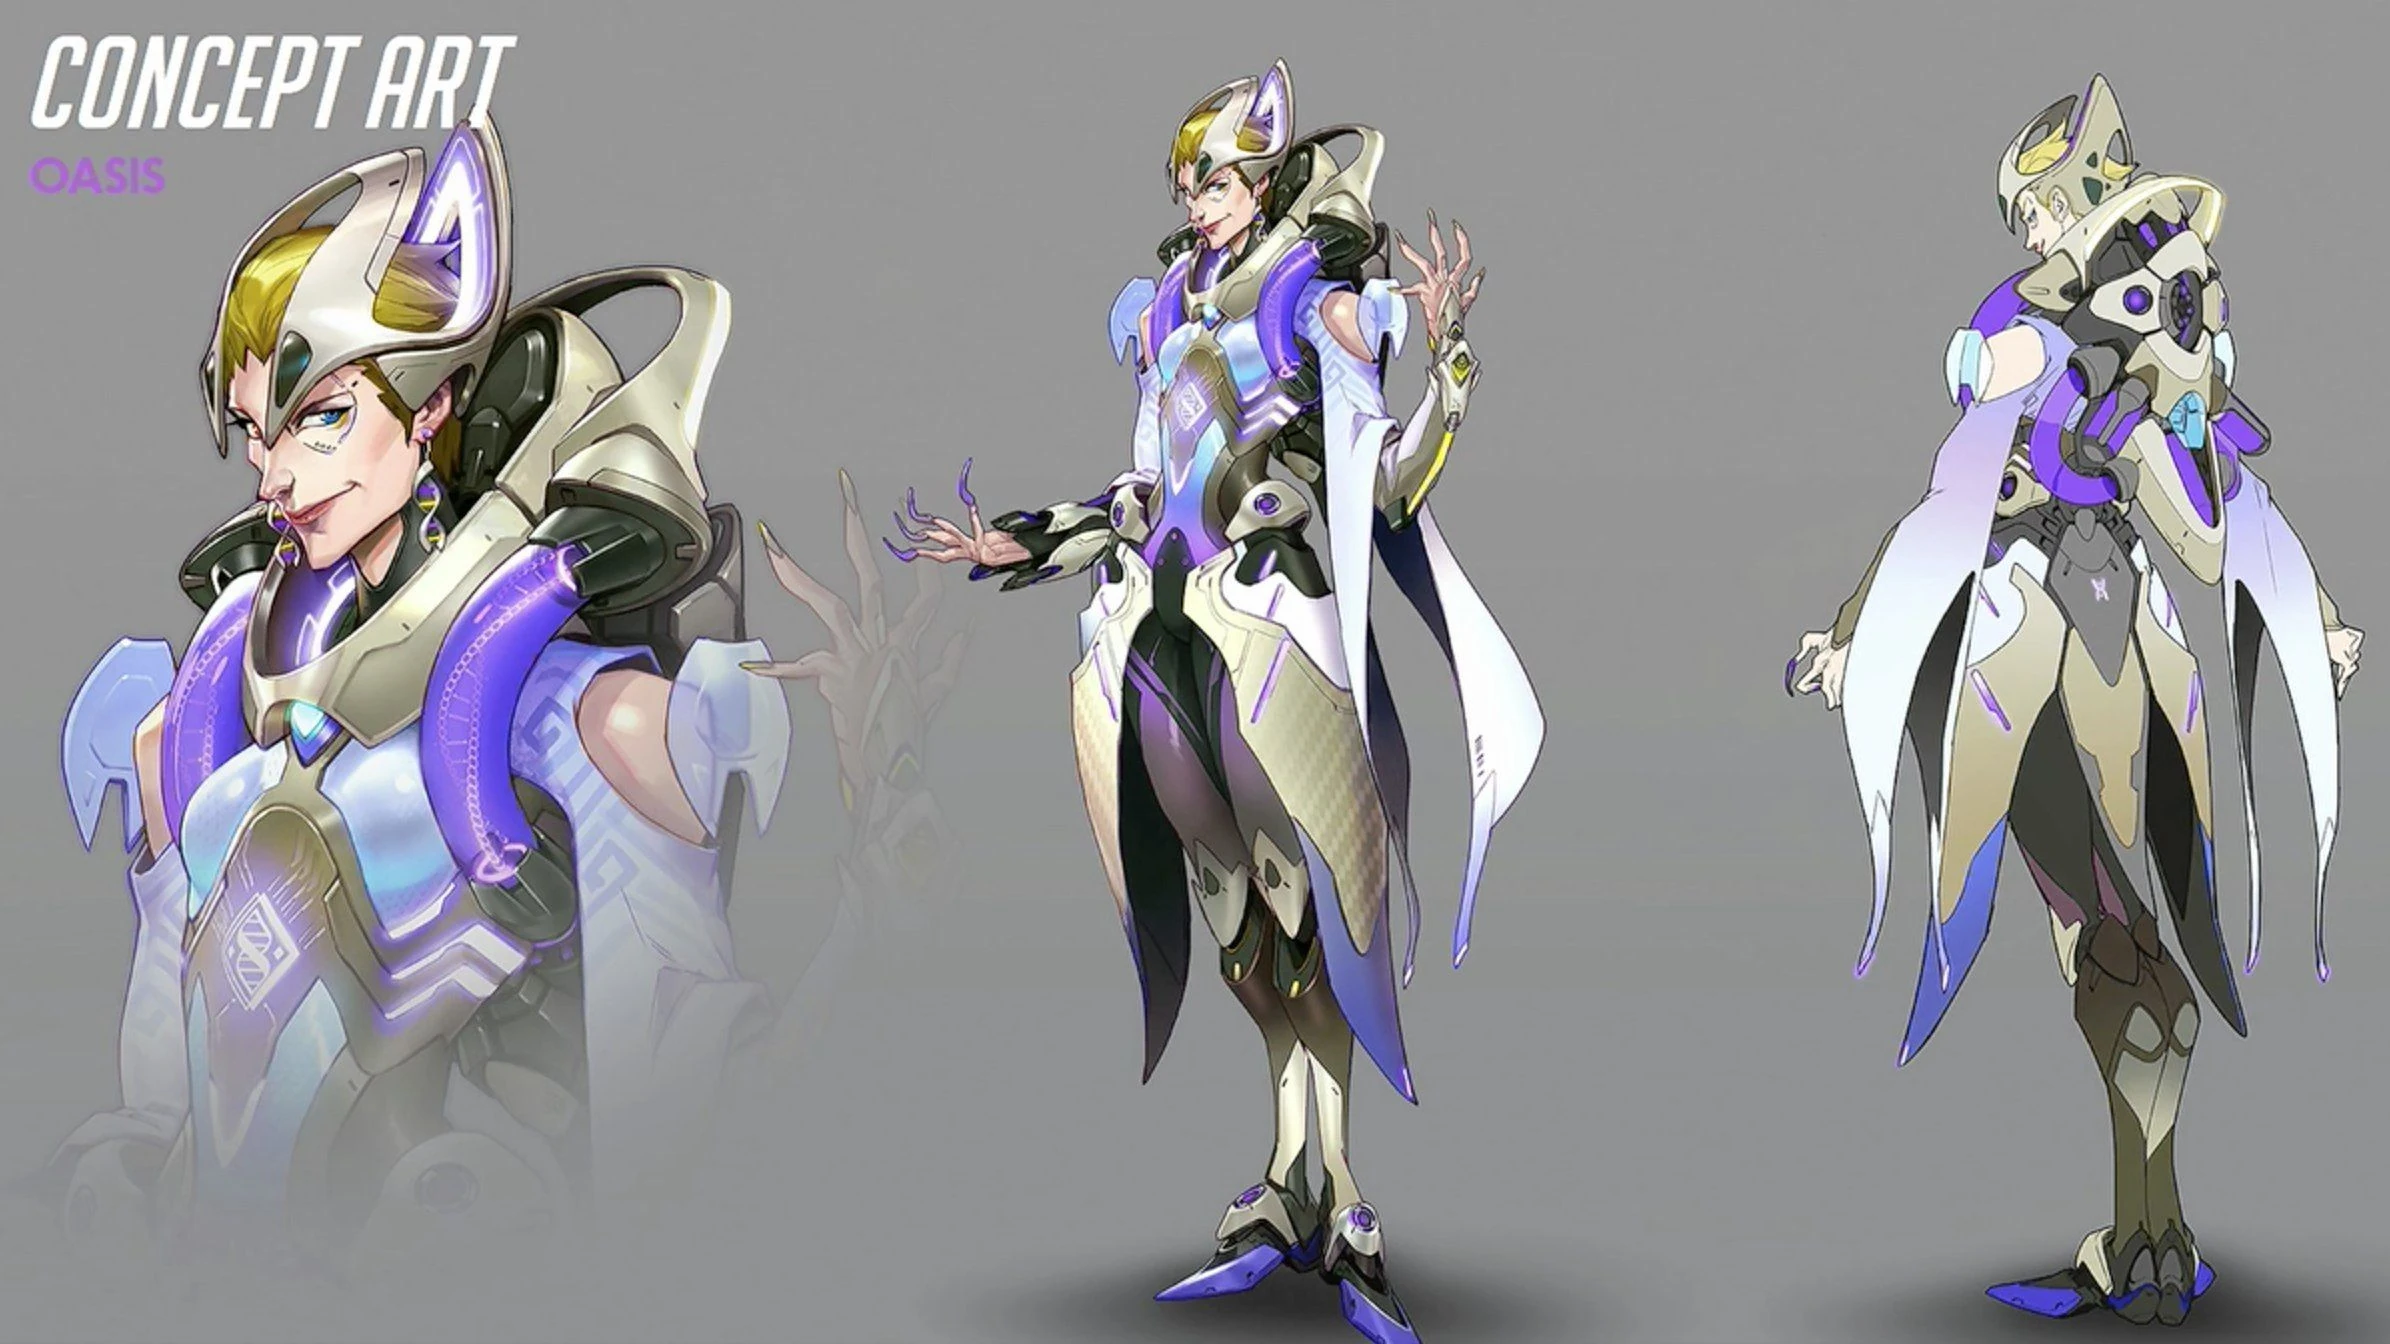

Moira Oasis skin concept art
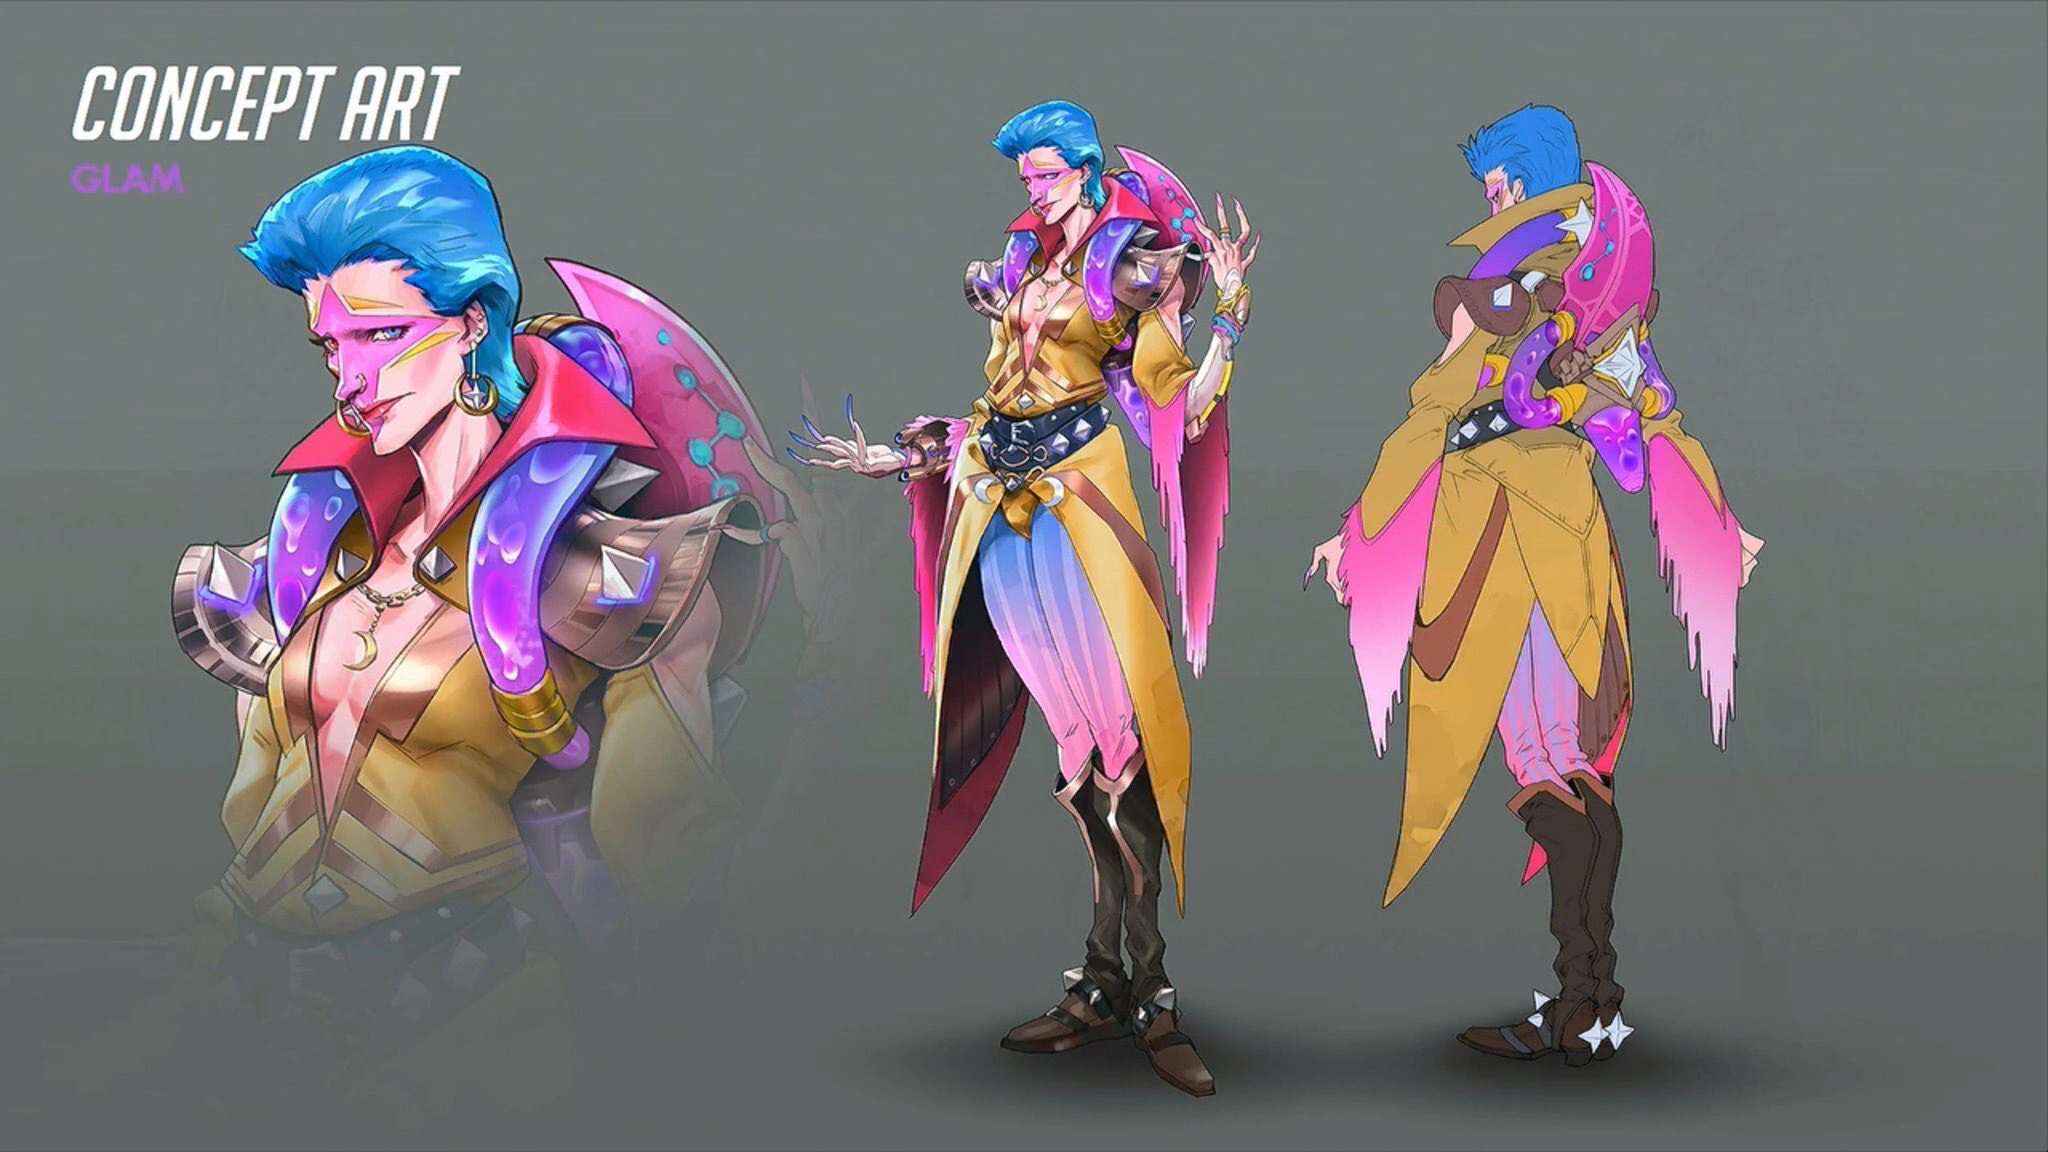

Moira Glam skin concept art


Moira Ice Empress skin concept art
Moira's initial gameplay design involved her having a large health pool, which she would spend as a resource to heal allies while draining health from enemies, but it proved to be too difficult to balance. Early inspiration for her abilities may have been drawn from Overmind, a hero created for the original Prometheus pitch. In her final design, she instead uses separate Regeneration and Decay versions of her abilities, with her Biotic Grasp: Decay ability leeching health from enemies and enhancing the effectiveness of her Regeneration abilities. Because she is one of the few characters in the game to have both hands visible on the screen at all times, great care was taken with her animations to convey how these different abilities worked and reflected her design and personality. Her Fade ability was also designed to be similar to Reaper's Wraith Form, showing that the two characters are connected. The original version of her ultimate ability was a transformation that involved biotic energy swirling around her and gave her a beam that could both heal and damage, but as the beam was the most interesting aspect of the ability they decided to make it her ultimate's sole focus.[10]
Merchandise
- The Blizzard store lists a Moira T-shirt for both Men and Women.
- The Blizzard store lists Overwatch Magnet sets, series 4 includes Moira's icon.
- Funko made a Blackwatch T-shirt for the 2018 Archives event, Retribution, which lists the members including Moira O' Deorain.
- The Blizzard store has an Ultimate Moira Hoodie available.
- Cute But Deadly Series 5 has a Moira figure to collect.
- Funko made a pop figure of Moira in 2019.
Videos
Official
Curse
Ohnickel
KarQ
Low Mana Gaming
TGN
Balance Change Logs
Healing
- Lingering heal reduced from 4 seconds to 2 seconds (Total healing from 65 down to 35)
- Healing per second increased from 65 to 70
- Healing resource consumption rate increased from 11 to 14 (27%)
Damage
- Attach angle reduced by 37%
- Healing resource gain rate increased by 50%
- Damage radius reduced from 5 to 4 meters
- Projectile speed increased from 16 to 20
- Projectile duration reduced from 10 to 7 seconds
- Heal over time duration increased from 3 to 4 seconds
- Total healing increased from 50 to 65
- Transparency increased the closer you are to a target
- Now becomes more transparent the closer its visual effects are to a player’s camera
- Transparency increased the closer you are to a target
References
- ↑ Michael Chu on Twitter""
- ↑ 2.0 2.1 2.2 2.3 2.4 2.5 2.6 2.7 Moira, Blizzard Entertainment. Accessed on 2017-04-11
- ↑ 3.0 3.1 3.2 3.3 3.4 2017-11-03, Moira Origin Story | Overwatch. YouTube, accessed on 2017-04-11
- ↑ 4.0 4.1 2017-11-03, BLIZZCON 2017: NEW DETAILS ON OVERWATCH HERO MOIRA AND BLIZZARD WORLD MAP. IGN, accessed on 2017-11-04
- ↑ 5.0 5.1 5.2 5.3 5.4 5.5 5.6 2017-11-12, BlizzCon 2017 Overwatch: What’s Next Panel Transcript. Blizzplanet, accessed on 2017-11-18
- ↑ Reaper, Blizzard Entertainment. Accessed on 2014-12-15
- ↑ 2018-04-04, NEW SEASONAL MISSION Retribution Overwatch. YouTube, accessed on 2018-04-08
- ↑ Overwatch Retribution
- ↑ Overwatch, Moira Quotes
- ↑ 10.0 10.1 10.2 10.3 2017-11-3, Blizzcon 2017 Overwatch: What's New Panel
- ↑ 2017-11-12, BlizzCon 2017 Overwatch: What’s Next Panel Transcript. Blizzplanet, accessed on 2017-11-19
- ↑ 2018-12-12, Michael Chu's Twitter. Twitter, accessed on 2018-12-12
- ↑ Monroe-Cassel, Chelsea. Overwatch: The Official Cookbook. Insight Editions, 2019.
External links
| Heroes in Overwatch 2
| ||||||||||
|---|---|---|---|---|---|---|---|---|---|---|
Moira | ||||||||||